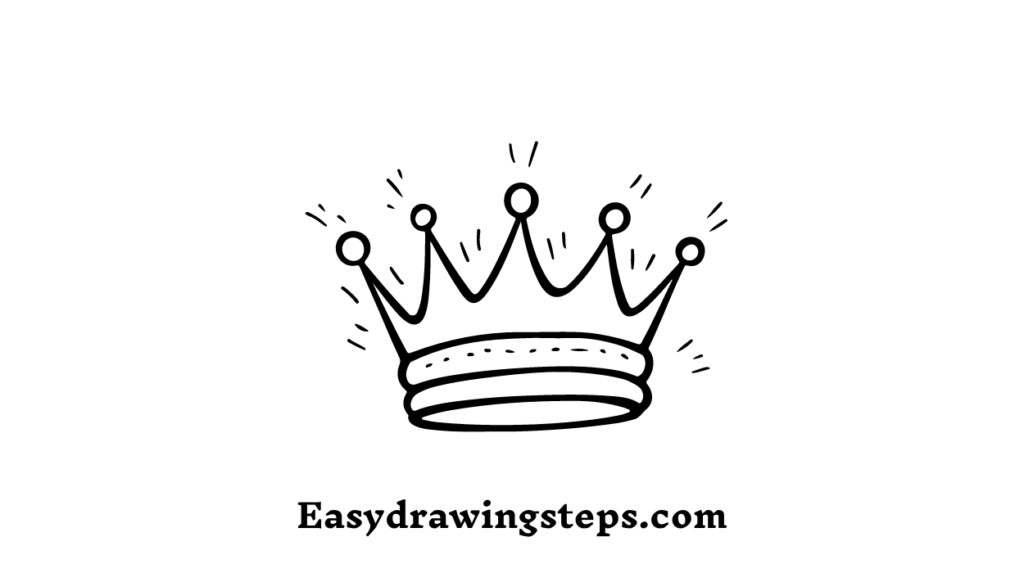
Crown Drawing : Drawing a crown can be a fun and creative exercise, whether you are a beginner or an experienced artist.
In this guide, we will take you through 10 easy steps to create a stunning crown drawing.
This guide includes tips for making it simple, whether you are drawing a king’s crown, a queen’s crown, or just an easy and simple crown drawing.
Step 1: Draw the Base
Start by drawing the base of the crown. This can be a simple horizontal oval or a slightly curved line, depending on the perspective you want. This base will serve as the foundation for the rest of your crown.
Step 2: Sketch the Basic Shape
From the base, draw two vertical lines upwards to create the height of the crown. Connect the tops of these lines with a slightly curved horizontal line to form the top of the crown.
Also Read : 10 easy steps to draw Pineapple Drawing
Step 3: Add the Peaks
Divide the top line into sections and draw upward peaks to represent the points of the crown. Typically, a crown has five or six peaks, but you can adjust this based on your design.

Step 4: Draw the Crossbars
To add detail, draw horizontal lines across the crown’s height, creating crossbars. These lines should curve slightly to follow the shape of the crown.
Also Read : 10 easy steps to draw Helicopter Drawing
Step 5: Outline the Crown
Using the initial sketch, outline the entire crown with more defined lines. This will give your drawing a clearer structure and a more polished look.

Step 6: Add Jewels
Draw circles or ovals at the peaks of the crown and along the crossbars to represent jewels. These can be varied in size to add visual interest.
Also Read : 10 easy steps to draw Harela Drawing
Step 7: Detail the Jewels
Inside each jewel, add smaller shapes to give them a faceted look. This step adds realism and makes the jewels appear more three-dimensional.
Step 8: Add Texture and Decoration
Enhance the crown by adding decorative elements like patterns, engravings, or additional small shapes around the jewels. This will give your crown a more intricate and royal appearance.
Also Read : 7 easy steps to draw Naruto Drawing
Step 9: Erase Guidelines
Carefully erase any unnecessary guidelines from your initial sketch. This will clean up your drawing and make it ready for the final touches.
Step 10: Color and Shade
Finish your drawing by adding color. Use gold, silver, or any other royal color for the crown itself. For the jewels, use vibrant colors like red, blue, green, and purple. Adding shading will give your crown depth and a more realistic look.
- Crown Drawing Easy: This guide simplifies the process of drawing a crown, making it accessible for artists of all skill levels. By breaking down the steps, even beginners can achieve a detailed and beautiful crown drawing.
- King Crown Drawing: The steps outlined here can be used to draw a king’s crown, which typically features more ornate designs and larger, more prominent jewels.
- Queen Crown Drawing: Similarly, the guide can help in drawing a queen’s crown, often characterized by a more delicate design and elegant features.
- Easy Crown Drawing: The focus on simplicity ensures that the drawing process is straightforward and manageable, without compromising on the final appearance of the crown.
- Simple Crown Drawing: For those looking for a less detailed and quicker drawing, the steps can be adjusted to create a simple crown. This version focuses on basic shapes and fewer decorations.
Drawing a crown can be an enjoyable and rewarding experience. By following these 10 easy steps, you can create a crown that looks intricate and royal, perfect for any drawing project. Whether you are drawing for kids, adding a regal touch to a character, or just exploring your creativity, this guide will help you achieve a stunning result.
FAQ
How can I start drawing a crown?
Begin by drawing the base of the crown, which is typically a horizontal oval or a slightly curved line. This base will serve as the foundation for the rest of your crown drawing.
What are the key elements to include in a crown drawing?
Key elements of a crown drawing include the base, the vertical lines creating the height, the peaks at the top, crossbars for structure, and decorative elements such as jewels and patterns.
How do I make the jewels on the crown look realistic?
To make the jewels look realistic, draw them as circles or ovals and add smaller shapes inside to give them a faceted appearance. You can also add shading and highlights to enhance their three-dimensional look.
What are some tips for adding texture and decoration to a crown drawing?
You can add texture and decoration by incorporating patterns, engravings, and additional small shapes around the jewels. Using a variety of lines and shapes will give your crown a more intricate and royal appearance.
How can I make my crown drawing stand out?
To make your crown drawing stand out, ensure you have clean outlines, detailed decorations, and vibrant colors. Adding shading and highlights will give your crown depth and a more realistic look. You can also use gold or silver colors for the crown and bright colors for the jewels to enhance the overall effect.


