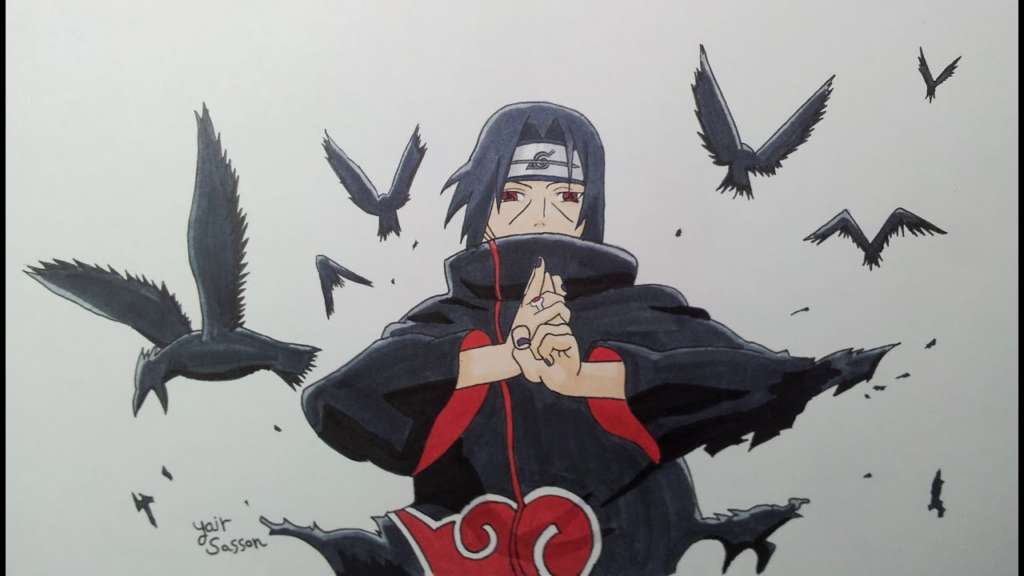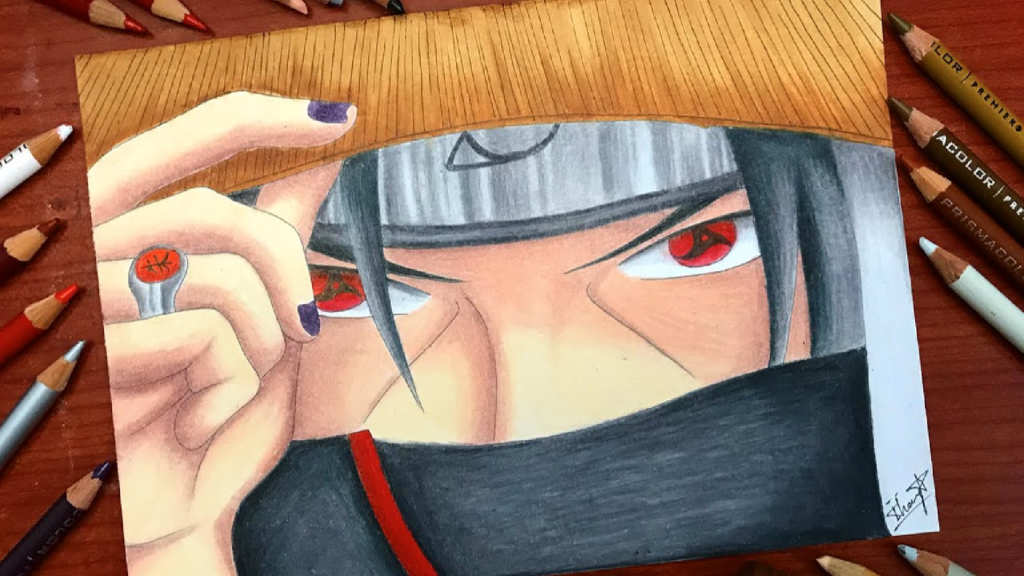
Itachi Drawing : If you’re a fan of Naruto, you’ve probably admired the cool and mysterious character of Itachi Uchiha.
Drawing Itachi can seem daunting, but with a few simple steps, you can create your own pencil sketch of this iconic character.
Whether you’re looking for an easy Itachi drawing or aiming to sketch a detailed portrait, this guide will help you achieve your goal. Let’s dive into the 10 easy steps to draw Itachi Uchiha.
Step 1: Gather Your Materials for Itachi Drawing
Before you begin, make sure you have the following materials:
- Pencil
- Eraser
- Drawing paper
- Reference image of Itachi
Also Read : 10 easy steps to draw Tiger Drawing
Step 2: Outline the Face
Start with an oval shape for Itachi’s face. Divide the oval with a vertical and a horizontal line to help with the placement of his facial features.
Step 3: Draw the Eyes
Itachi’s eyes are one of his most distinctive features. Draw almond-shaped eyes along the horizontal line. Add the Uchiha clan’s Sharingan details within the eyes.
Also Read : 10 easy steps to draw Pikachu Drawing
Step 4: Sketch the Eyebrows and Nose
Draw the eyebrows slightly above the eyes, with a serious and intense expression. Add a simple, small curve for the nose, positioned between the eyes.

Step 5: Add the Mouth and Ears
Draw a small, straight line for the mouth, keeping it neutral or slightly frowning to capture Itachi’s serious demeanor. Sketch the ears on either side of the head, aligning them with the eyes.
Also Read : 10 easy steps to draw Parrot Drawing
Step 6: Draw the Hair
Itachi’s hair is long and falls over his face. Start by drawing the outline of his hair, then add individual strands for a more detailed look. Ensure the hair covers part of his forehead and ears.
Step 7: Add Itachi’s Headband
Draw the Leaf Village headband across Itachi’s forehead. Don’t forget to add the symbol in the center. It’s a small but crucial detail that defines his character.
Also Read : 10 easy steps to draw Car Drawing
Step 8: Sketch the Neck and Shoulders
Extend lines down from the head to form the neck. Add the shoulders, making sure they are broad to match Itachi’s physique. You can add the collar of his cloak for more detail.

Step 9: Detail the Cloak
Itachi’s cloak is an important part of his look. Draw the high collar and add the cloud patterns on the cloak. This step will give your drawing more authenticity.
Also Read : 10 easy steps to draw Save Earth Drawing
Step 10: Final Touches and Shading
Review your drawing and make any necessary adjustments. Once satisfied, add shading to give your Itachi drawing depth and dimension. Shade around the eyes, under the nose, and along the cloak to highlight the features.
Bonus Tips for a Cool Itachi Drawing
- Use a reference image to capture the details accurately.
- Practice drawing the Sharingan and Mangekyō Sharingan for Itachi’s eyes.
- Experiment with different shading techniques to enhance the realism of your pencil Itachi drawing.
By following these steps, you can create a cool Itachi drawing that captures the essence of this beloved character.
Whether you’re sketching Itachi for fun or as part of a Naruto fan art collection, these steps will help you achieve an impressive result. Happy drawing!
FAQ
What materials do I need to draw Itachi Uchiha?
You need a pencil, eraser, drawing paper, a reference image, a sharpener, and a ruler.
How do I draw Itachi’s Sharingan eyes accurately?
Draw almond-shaped eyes with a small central circle for the pupil, add three evenly spaced tomoe, and for the Mangekyō Sharingan, draw the intricate pattern inside.
How can I capture Itachi’s serious expression?
Draw narrowed, intense eyes, low eyebrows, a small neutral or frowning mouth, and add subtle shading around the eyes and mouth.
How do I add depth and dimension to my Itachi drawing?
Use shading techniques to create contrast, shade under the eyes, nose, and along the face, add shadows to the hair and cloak, and use cross-hatching or blending.
What common mistakes should I avoid when drawing Itachi?
Avoid misplacing facial features, incorrect proportions, overly dark lines, neglecting details, and inconsistent shading.


2 thoughts on “10 easy steps to draw Itachi Drawing”