


Krishna Drawing : Krishna, a beloved deity in Hinduism, is often depicted in art and literature with his divine charm and grace. Drawing Krishna can be a delightful experience, whether you’re an experienced artist or just starting your artistic journey. In this tutorial, I’ll guide you through 10 easy steps to create your own Krishna drawing.
Step 1: Sketch the Basic Outline of Krishna Drawing
- Start by sketching a rough outline of Krishna’s body using a light pencil. Begin with a circle for the head, add a slender neck, and then draw a basic body shape. Keep the lines simple and loose at this stage.
Step 2: Define the Facial Features
- Refine the facial features within the circle. Draw two almond-shaped eyes, a small nose, and a smiling mouth. Add a dot between the eyes to represent the bindi, a traditional Hindu adornment.
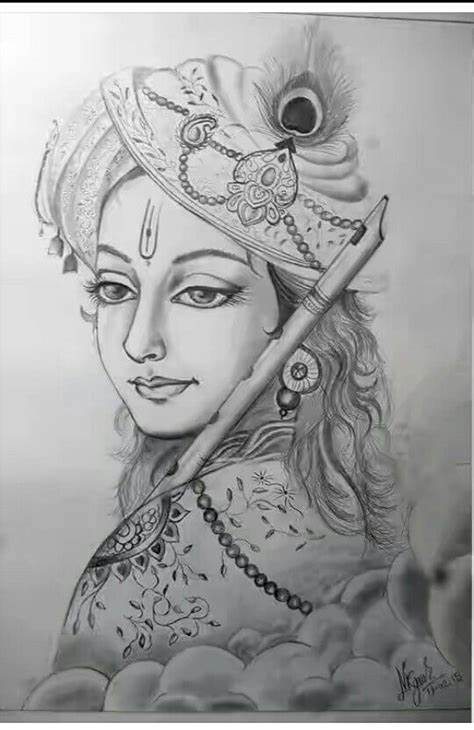
Step 3: Outline the Crown and Accessories
- Krishna is often depicted wearing a peacock feather crown (Mukut) and various accessories like earrings and necklaces. Sketch these details lightly to maintain proportion and balance.
Also read : 7 Easy steps to draw hanuman drawing
Step 4: Draw the Hair
- Extend the crown’s base to form Krishna’s hair. Add some loose strands to give it a natural look. Remember to include the distinctive peacock feather in the crown.
Step 5: Refine the Body
- With the basic outline in place, define Krishna’s body by adding details like arms, hands, and clothing. Krishna is often depicted wearing traditional attire like a dhoti (a long skirt-like garment) and a stole.
Step 6: Add Flute and Accessories
- Krishna is famously associated with playing the flute. Draw a flute resting on one of his hands. You can also add other accessories like bracelets and anklets to embellish the drawing.
Step 7: Refine Facial Details
- Go back to Krishna’s face and add more details like eyebrows, eyelashes, and ears. Pay attention to the expression, aiming for a serene and joyful demeanor.
Step 8: Erase Unnecessary Lines
- Carefully erase any unnecessary lines and smudges to clean up the drawing. Use a kneaded eraser for precision, especially around intricate areas like the facial features.
Step 9: Add Shading and Texture
- To give your drawing depth and dimension, add shading to different parts of Krishna’s body and attire. Pay attention to light sources and shadows to create a realistic effect. You can also add texture to the clothing and accessories for a more lifelike appearance.
Step 10: Final Touches
- Once you’re satisfied with the shading and detailing, step back and assess your drawing as a whole. Make any final adjustments or additions as needed. Consider adding a background or decorative elements to complement the Krishna figure.
Drawing Krishna can be a fulfilling artistic endeavor, allowing you to capture the beauty and spirituality associated with this revered deity. By following these 10 easy steps, you can create your own Krishna drawing that reflects your creativity and devotion. Remember to enjoy the process and embrace the joy of bringing Krishna to life on paper
What colors are commonly used in Krishna drawings, and what do they symbolize?
In Krishna drawings, vibrant colors are often used to depict his divine essence and playful nature. Blue is the predominant color associated with Krishna, symbolizing his transcendental nature and the infinite sky. Yellow is also commonly used to represent his joyful and compassionate personality, while green symbolizes his connection with nature and vitality. Additionally, white and gold accents are used to highlight his purity and divine aura.
Are there specific artistic styles or techniques traditionally used in Krishna drawings?
Yes, several artistic styles and techniques are traditionally employed in Krishna drawings, reflecting regional preferences and cultural influences. One common style is the classical Indian miniature painting, characterized by intricate details, vibrant colors, and elaborate patterns. Another popular technique is Madhubani art, originating from the Mithila region of India, known for its bold lines, geometric patterns, and use of natural dyes. Additionally, artists often incorporate elements of Tanjore painting, characterized by rich colors, gilded embellishments, and three-dimensional relief work, to create stunning Krishna depictions.
1 thought on “10 Easy steps to draw Krishna Drawing”