Natural Scenery Drawing : Drawing natural scenery can be a delightful and relaxing activity, especially when you break it down into easy steps.
This guide will help you create a beautiful scene, perfect for artists of all ages, including kids. Whether you’re interested in drawing a village scene or a simple landscape, these steps will guide you through the process.
Step 1: Sketch the Horizon
Begin by drawing a horizontal line across your paper. This line represents the horizon where the sky meets the land. Position it slightly above the center of your page for a balanced composition.
Step 2: Add the Mountains
Above the horizon line, sketch a series of triangles to represent mountains. Vary the heights and shapes to make them look natural. These mountains will add depth to your scenery.
Also Read : 10 easy steps to draw Easy Simple Scenery Drawing
Step 3: Draw the Sun
In the sky, draw a circle for the sun. Place it either rising from behind the mountains or setting to create a focal point and bring your scene to life.

Step 4: Create the Clouds
Add fluffy clouds in the sky by drawing soft, irregular shapes. These can overlap with each other and the sun to give a realistic look.
Also Read : 10 easy steps to draw Beautiful Easy Scenery Drawing
Step 5: Outline the Trees
Below the horizon, draw the outlines of trees. Start with a few larger ones in the foreground and smaller ones as you move back towards the horizon. This will help create a sense of depth.

Step 6: Add a River or Path
Draw a winding river or path starting from the foreground and leading towards the horizon. This element will guide the viewer’s eye through the scene and add interest.
Also Read : 10 easy steps to draw Nature Easy Scenery Drawing
Step 7: Sketch a Village
In one corner of your scenery, sketch a small village. Include simple shapes for houses, such as squares and rectangles, with triangular roofs. Adding a few windows and doors will make them more detailed.
Step 8: Include Vegetation
Add bushes and grass around the trees and along the river or path. Use short, quick strokes to give the impression of leaves and blades of grass.
Also Read : 10 easy steps to draw Beautiful Scenery Drawing
Step 9: Refine the Details
Go over your initial sketches, refining the details. Add texture to the mountains, bark to the trees, and shingles to the roofs. Small details can make a big difference in bringing your drawing to life.
Step 10: Color Your Drawing
Finally, bring your scenery to life with color. Use greens for the trees and grass, blues for the sky and river, and earthy tones for the village. Don’t forget to add shading to give depth and dimension.
Drawing Natural Scenery for Kids
Kids love drawing natural scenery because it allows them to express their creativity while learning about nature. Simplify each step for younger artists, focusing on basic shapes and lines. Encourage them to use their favorite colors and add their own unique elements to the scenery.
Easy Natural Scenery Drawing
For an easy natural scenery drawing, focus on fewer elements and simpler shapes. A basic scene with a sun, a few clouds, and a couple of trees can be both beautiful and manageable. This approach is perfect for beginners or those looking for a quick, satisfying drawing experience.
Village Natural Scenery Drawing
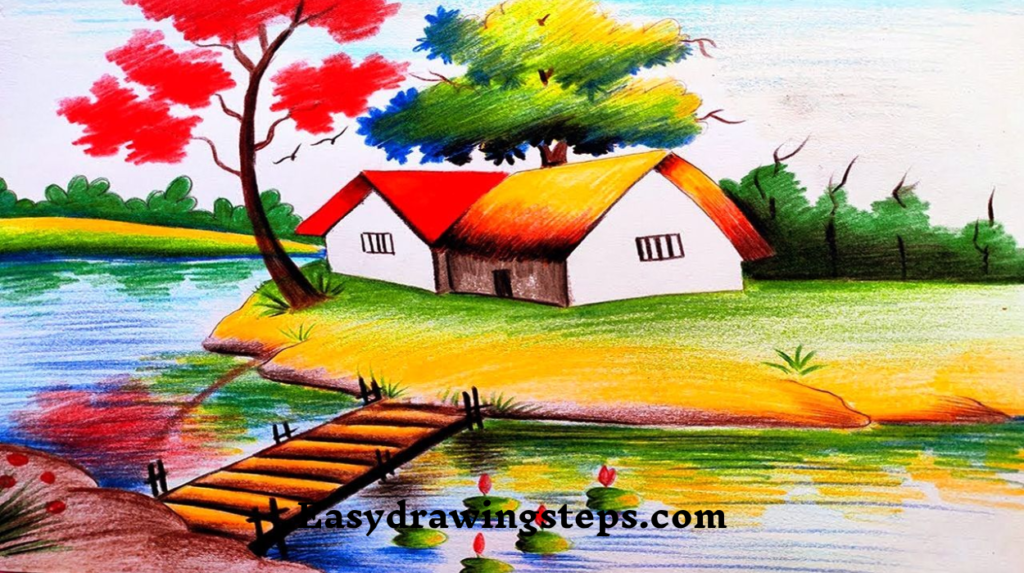
A village natural scenery drawing captures the charm of rural life. Include small houses, a winding path, and a backdrop of trees and mountains. This type of scene often evokes a sense of peace and nostalgia, making it a favorite subject for many artists.
Drawing natural scenery can be a rewarding activity for artists of all ages and skill levels. By breaking down the process into easy steps, anyone can create a beautiful and serene landscape. Whether you’re a child learning to draw, a beginner looking for an easy project, or someone interested in village scenes, these guidelines will help you create a stunning natural scenery drawing. So grab your pencils and let your creativity flow!
FAQ
What are the basic elements to include in a natural scenery drawing?
The basic elements of a natural scenery drawing typically include a horizon line, mountains or hills, a sun or moon, clouds, trees, a river or path, and perhaps some vegetation like bushes or grass. Adding a small village or a few houses can also enhance the scene.
How can you create depth in a natural scenery drawing?
To create depth in a natural scenery drawing, use techniques such as overlapping objects (like trees or mountains), varying the size of objects (larger in the foreground and smaller in the background), and using perspective lines, such as a river or path that narrows as it recedes into the distance. Adding shading and different levels of detail also helps create a sense of depth.
What tips can help beginners draw natural scenery more easily?
Beginners can simplify the drawing process by breaking it down into basic shapes and lines. Start with a simple horizon line, then add basic shapes for mountains, trees, and other elements. Using light pencil strokes allows for easy corrections. Additionally, observing real-life landscapes or photos for reference can provide inspiration and guidance.
How can kids be encouraged to draw natural scenery?
Encourage kids to draw natural scenery by providing them with simple step-by-step instructions and focusing on fun, easy-to-draw elements like the sun, clouds, and trees. Allow them to use their favorite colors and add their own creative touches. Providing praise and positive feedback will boost their confidence and enjoyment.
What are some common mistakes to avoid when drawing natural scenery?
Common mistakes in drawing natural scenery include not using a horizon line, which helps balance the composition; making objects too uniform in size and shape, which can make the drawing look flat; and neglecting to add details or textures, which can make the drawing appear unrealistic. Additionally, not considering light and shadow can result in a lack of depth and dimension.


1 thought on “10 easy steps to draw Natural Scenery Drawing”