

Snowflake Drawing : Drawing a snowflake is a fun and creative activity, especially when you break it down into simple steps. Snowflakes are beautiful, symmetrical shapes found in nature, and their unique patterns can make for an impressive drawing.
In this guide, we’ll take you through 10 easy steps to create your own stunning snowflake drawing. Whether you’re a beginner or an experienced artist, these instructions will help you craft the perfect snowflake.
Step 1: Draw a Small Circle at the Center
Start by drawing a small circle in the middle of your paper. This will serve as the center of your snowflake and where all the branches will originate.
Step 2: Draw Two Intersecting Lines
From the center circle, draw two straight lines that intersect at a 90-degree angle. These lines will form the basic structure or framework for your snowflake.
Also Read : 10 Easy Steps to Draw Radha Rani Drawing
Step 3: Draw Two More Diagonal Lines
Next, draw two diagonal lines through the center, creating an asterisk or star-like shape. These lines should intersect evenly, ensuring that all the arms of the snowflake are equal in length.
Step 4: Add Small V Shapes to the Ends
At the end of each line, draw a small V shape. These will be the branches of the snowflake and give it the characteristic spiky look. Make sure the V shapes are symmetrical for a balanced appearance.

Step 5: Connect the Branches
Now, connect the branches by drawing small lines between the arms. You can draw straight lines or slightly curved ones, depending on how intricate you want your snowflake to be. These connecting lines help form the internal structure of the snowflake.
Step 6: Add Additional V Shapes
To make your snowflake drawing more detailed, add smaller V shapes to the lines you’ve already drawn. Place these V shapes in the middle of the branches to add more complexity and design to your snowflake.
Also Read : 10 Easy Steps to Draw Hindi Diwas Par Drawing
Step 7: Refine the Outline
Go over your drawing and refine the shape of the snowflake. Make sure the lines are clean and sharp, and erase any unnecessary pencil marks or rough edges. This will help make your snowflake look more polished.
Step 8: Add Symmetry to the Branches
Snowflakes are known for their symmetry, so double-check that all of your branches are evenly spaced and that each section mirrors the others. Adjust any lines or shapes that might be uneven or unbalanced.
Also Read : 10 Easy Steps to Draw Hindi Divas Drawing
Step 9: Add Details Inside the Branches
Now that the basic structure of your snowflake is complete, you can add intricate details inside the branches. These can be small circles, additional lines, or even tiny triangles. Get creative with your patterns while maintaining the symmetrical look.
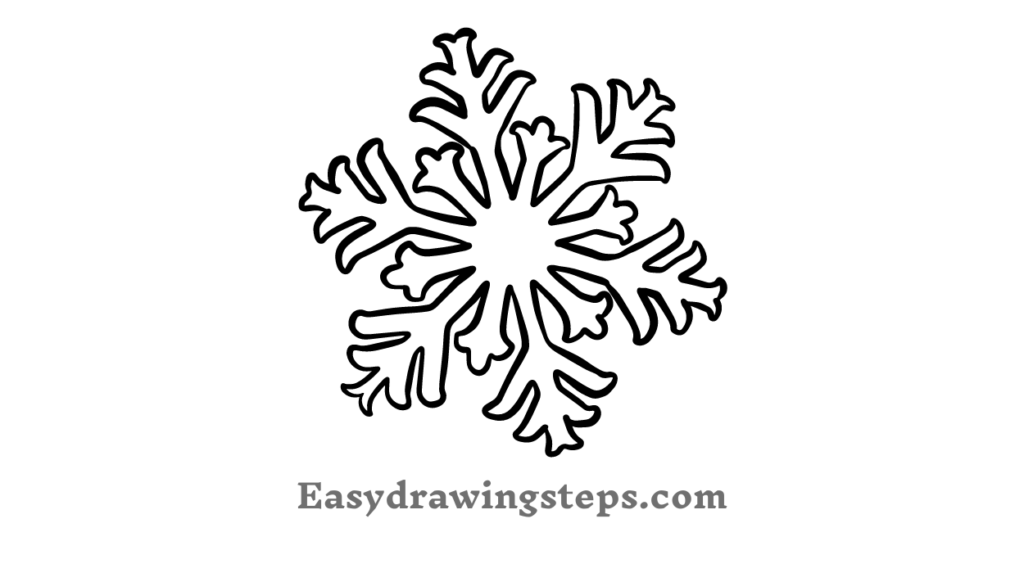
Step 10: Outline or Color Your Snowflake (Optional)
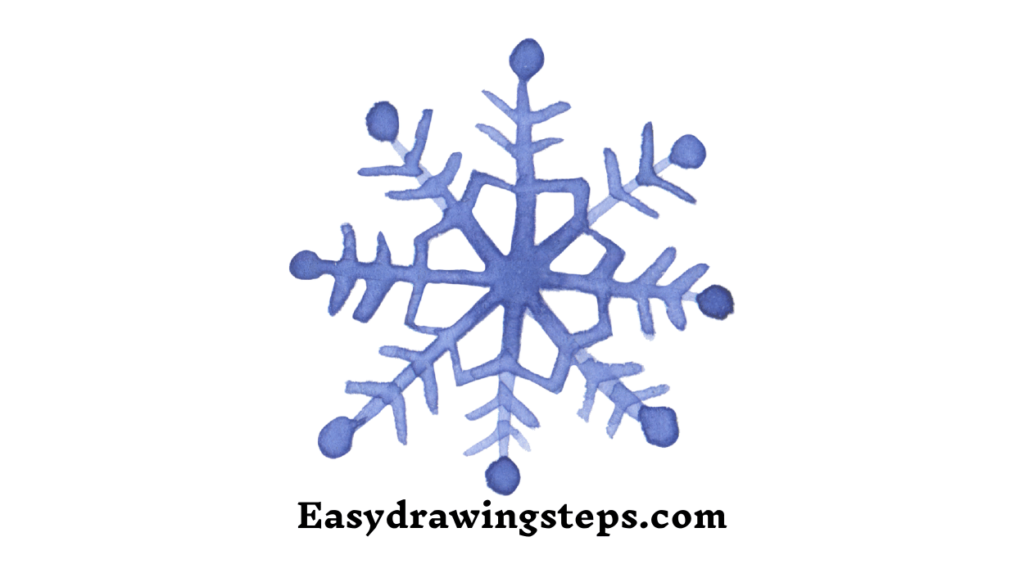
Finally, go over your drawing with a darker pencil or pen to outline the entire snowflake. You can also add color if you’d like—snowflakes are traditionally white or blue, but you can experiment with different shades for a creative touch. If you’re feeling adventurous, try using glitter or metallic pens to give your snowflake a shimmering effect.
Easy Snowflake Drawing
- Drawing a snowflake can be made easy by focusing on its basic geometric shapes. The simple combination of straight lines and V shapes ensures that even beginners can create a beautiful snowflake with minimal effort.
Snowflake Drawing Easy
- Following these step-by-step instructions makes creating a snowflake drawing easy. By using simple shapes and adding symmetrical details, you can craft a perfect snowflake without complicated techniques or tools.
Simple Snowflake Drawing
- For a simple snowflake drawing, stick to just a few lines and basic shapes. Keep the design minimal by limiting the number of V shapes and extra details, allowing the natural beauty of the snowflake’s geometry to shine through.
Cute Easy Snowflake Drawing
- To create a cute snowflake drawing, add rounded edges and softer curves to your shapes. You can also use fun colors like pastel blues, pinks, or purples to give the drawing a more playful and adorable appearance.
Snowflake Drawing Simple
- A simple snowflake drawing focuses on clear, crisp lines and straightforward designs. This is perfect for beginners or those who prefer clean and minimalistic artwork. Drawing only the main branches with minimal decorations keeps the drawing simple and elegant.
Outline Snowflake Drawing
- Creating an outline snowflake drawing involves focusing on the outer shape of the snowflake without adding too many internal details. Start with the basic framework and outline each branch carefully to ensure the shape stands out. This is ideal if you’re planning to color in or add shading later.
By following these 10 easy steps, you can create a stunning snowflake drawing that’s both simple and beautiful. Whether you want to keep it minimalistic or add more intricate details, the result will be a unique and symmetrical snowflake that captures the wonder of winter. Happy drawing!
Snowflake Drawing FAQ
How can I make a snowflake drawing easy for beginners?
To make a snowflake drawing easy, start with simple shapes like lines and V shapes. Draw two intersecting lines, then add more diagonal lines to create an asterisk shape. From there, you can add small V shapes at the ends of each line to form the branches of the snowflake.
What tools should I use to draw a simple snowflake?
For a simple snowflake drawing, you’ll need a pencil, eraser, and ruler to ensure straight lines. Once you’ve completed the drawing, you can outline it with a pen or marker, and if desired, use colored pencils or watercolors to add color.
How can I make my snowflake drawing more creative?
You can make your snowflake drawing more creative by adding unique patterns or details inside the branches. For example, add dots, triangles, or curved lines. Experimenting with different shapes or even using colored glitter or metallic pens can also make your drawing stand out.
How do I ensure symmetry in my snowflake drawing?
Snowflakes are naturally symmetrical, so it’s important to carefully measure and space your lines evenly. Using a ruler and dividing the snowflake into equal sections can help. Always make sure that the details you add on one side are mirrored on the opposite side for perfect symmetry.
What are some easy ways to color a snowflake drawing?
To color your snowflake drawing, you can use soft shades of blue, white, or silver to give it a frosty effect. You can also experiment with watercolors for a smooth, blended look, or use colored pencils for more precise shading. Adding a touch of glitter or metallic accents can give it a festive, wintery appearance.
1 thought on “10 Easy Steps to Draw Snowflake Drawing”