
Easy Krishna Drawing : Krishna, the beloved deity known for his charm, wisdom, and playful nature, is a favorite subject for artists of all ages. Drawing Krishna can be a delightful experience, especially when you break it down into simple, easy-to-follow steps.
This guide will take you through the process of creating an easy Krishna drawing, perfect for beginners and kids alike.
Step 1: Gather Your Drawing Supplies
Start by gathering all the necessary supplies. You’ll need:
- A pencil (HB or 2B is ideal)
- Eraser
- Drawing paper
- Ruler (optional)
- Coloring materials (if you want to add color)
Having your materials ready ensures a smooth drawing process.
Step 2: Draw the Basic Outline of Krishna’s Face
Begin by drawing a circle for Krishna’s head. Add a vertical line down the center and a horizontal line across the middle to serve as guidelines. These lines will help you place Krishna’s facial features symmetrically.
Also Read : 10 Steps to Draw Easy Simple Radha Krishna Drawing
Step 3: Sketch Krishna’s Eyes and Nose
Next, sketch Krishna’s eyes along the horizontal guideline. His eyes are often depicted as large and almond-shaped, reflecting his divine nature. Below the eyes, draw a small curve for the nose. Keep the features simple to maintain the ease of the drawing.

Step 4: Draw the Lips and Chin
Under the nose, draw Krishna’s lips with a gentle smile. This smile is a key feature that captures his playful and loving nature. Then, shape the chin, aligning it with the rest of the face. The chin should be soft and rounded.
Also Read : 10 Steps to Draw Pencil Easy Krishna Drawing
Step 5: Add Krishna’s Flute
Krishna is famously associated with the flute, which symbolizes his divine music. Draw a small flute near his lips, as if he’s about to play a tune. The flute should be simple, with two or three holes visible. This element adds a distinct characteristic to your drawing.

Step 6: Draw the Hair and Crown
Krishna’s hair is often depicted as wavy and abundant. Sketch his hair flowing gently around his head. You can also add a small crown or a peacock feather to signify his divine status as “Kanha Ji.” This will give your drawing an iconic touch.
Also Read : 10 Steps to Draw Easy Cute Krishna Drawing
Step 7: Outline Krishna’s Upper Body and Clothing
Draw the outline of Krishna’s shoulders and upper torso. He’s usually shown wearing traditional Indian attire, such as a dhoti or a shawl draped over his shoulder. Keep the clothing simple, focusing on the basic shapes and lines.
Step 8: Add Details to the Clothing and Accessories
Once the basic outline is complete, add some details to Krishna’s clothing. You can draw simple patterns on the dhoti or add small jewelry pieces like a necklace or bangles. These details will enhance the overall look of your drawing.
Also Read : 10 Easy Steps to Draw Bansuri Drawing
Step 9: Refine the Drawing and Add Shading
Go back over your drawing, refining the lines and adding shading where needed. Lightly shade Krishna’s hair, clothing, and flute to give the drawing more depth and dimension. This step will make your drawing look more polished and complete.
Step 10: Final Touches and Color (Optional)
Finally, add any final touches to your drawing. If you want to take your artwork to the next level, consider adding color using colored pencils, markers, or watercolors. Bright blues and yellows are often used for Krishna’s attire, while his skin is traditionally depicted in a soft blue.
Easy Krishna Drawing for Kids
- This guide is designed to be child-friendly, with simple steps that make it easy for kids to draw Krishna. The focus is on basic shapes and lines, ensuring that young artists can follow along without difficulty.
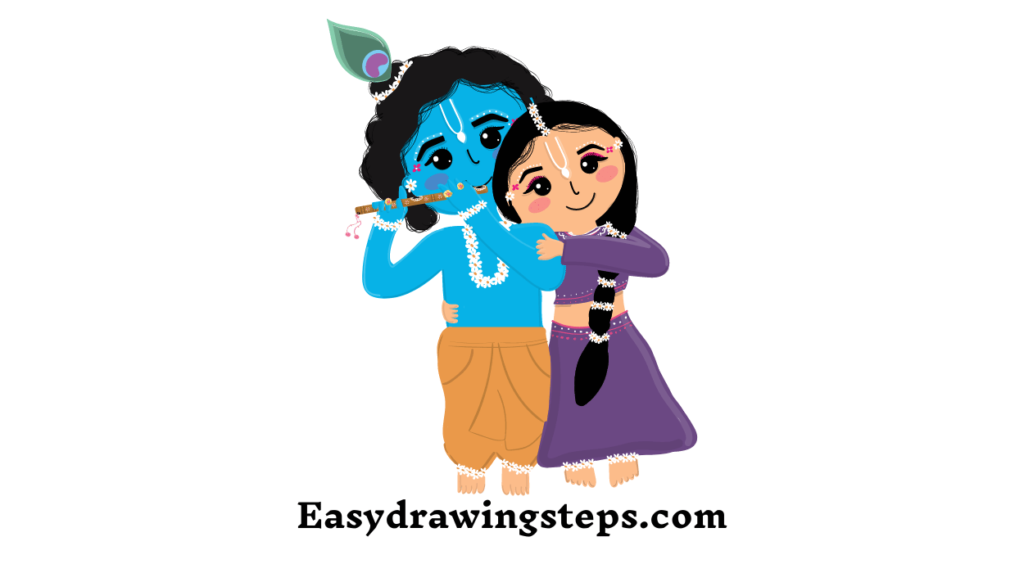
Radha Pencil Easy Krishna Drawing
- Radha is often depicted alongside Krishna in art. If you wish to include her in your drawing, you can use similar steps to create Radha’s figure. Position her close to Krishna, emphasizing their divine connection and love.
Kanha Ji Pencil Easy Krishna Drawing
- “Kanha Ji” is a term of endearment for Krishna. This guide allows you to capture the essence of Kanha Ji’s playful and loving nature in a simple pencil drawing. The addition of a flute or crown highlights his identity as the divine child.
Janmashtami Pencil Easy Krishna Drawing
- Janmashtami, the celebration of Krishna’s birth, is a perfect time to create this drawing. Whether for a school project or a festive decoration, this easy Krishna drawing is a meaningful way to honor the occasion.
Krishna Flute Pencil Easy Krishna Drawing
- The flute is a central symbol in Krishna’s iconography. This guide includes a step dedicated to drawing the flute, ensuring that it’s a prominent and recognizable part of your Krishna drawing.
Lord Radha Pencil Easy Krishna Drawing
- If you want to depict Radha alongside Krishna, focus on creating a harmonious composition where both figures complement each other. Radha can be drawn holding Krishna’s hand or gazing at him lovingly.
Sketch Easy Krishna Drawing
- This drawing is a basic sketch, emphasizing simplicity and ease. The steps are designed to help you create a recognizable image of Krishna without getting bogged down in complex details.
Drawing Krishna doesn’t have to be complicated. By following these 10 simple steps, you can create a beautiful, easy Krishna drawing that reflects his divine charm and playfulness. Whether you’re a beginner or an experienced artist, this guide ensures that the process is enjoyable and rewarding.
Embrace the creative journey and let your love for Krishna shine through your art!
Easy Krishna Drawing FAQ
What are the basic materials needed for drawing an easy Krishna sketch?
To draw an easy Krishna sketch, you’ll need basic materials such as a good-quality pencil (HB or 2B), an eraser, drawing paper, and a ruler if you want to create precise lines. Optional materials include colored pencils or watercolors if you want to add color to your drawing.
How can I make the Krishna drawing suitable for kids?
To make the Krishna drawing suitable for kids, simplify the steps by focusing on basic shapes and easy-to-follow lines. Encourage them to start with light sketches and emphasize Krishna’s playful expression. The guide in the blog post is already designed to be child-friendly, making it perfect for young artists.
How can I add Radha to the Krishna drawing?
To add Radha to your Krishna drawing, start by sketching her close to Krishna, ensuring her figure complements his. Radha can be drawn with a serene expression, gazing at Krishna or holding his hand. Follow similar steps as for Krishna, focusing on symmetry and simple lines to keep the drawing easy.
What significance does the flute have in Krishna’s drawing?
The flute is a central symbol in Krishna’s iconography, representing his divine music and the joy he brings to the world. Including the flute in your Krishna drawing highlights this important aspect of his character. Draw the flute near Krishna’s lips to depict him playing it, which adds authenticity to the artwork.
Can this Krishna drawing be used for Janmashtami celebrations?
Yes, this easy Krishna drawing is perfect for Janmashtami celebrations. The simple steps allow you to create a meaningful artwork that can be used for decorations, gifts, or educational purposes during the festival. The drawing captures the essence of Krishna, making it a beautiful tribute to the occasion.
1 thought on “10 Steps to Draw Easy Krishna Drawing”