Ganpati Rangoli Easy : Creating a Ganpati rangoli is a beautiful way to celebrate Ganesh Chaturthi and welcome Lord Ganesha into your home. Whether you’re an experienced artist or a beginner, making a rangoli that’s both easy and beautiful can add a festive touch to your celebrations.
In this blog, we’ll guide you through 10 simple steps to draw an easy Ganpati rangoli, including tips for creating designs that are perfect for beginners and those looking for smaller, more manageable projects.
Step 1: Gather Your Materials
Start by collecting all the materials you’ll need. For a Ganpati rangoli, you will need:
- Colored rangoli powders (commonly red, yellow, green, white, and blue)
- Chalk or white rangoli powder for outlining
- A stencil of Lord Ganesha or a reference image (optional)
- A small sieve for precise application
- A brush or toothpick for detailed work

Step 2: Prepare the Surface
Choose a clean and smooth surface where you plan to create the rangoli. This could be the floor of your entrance, a courtyard, or any visible spot in your home. Ensure the surface is dust-free to help the rangoli colors adhere better.
Also Read : 10 Easy Steps to Draw Ganpati Bappa Rangoli Simple
Step 3: Sketch the Outline
Using chalk or white rangoli powder, lightly sketch the outline of Lord Ganpati. If you’re using a stencil, place it on the surface and trace around it. For those new to rangoli art, starting with a simple outline can make the design process much easier.
Step 4: Draw a Simple Ganpati Rangoli Design
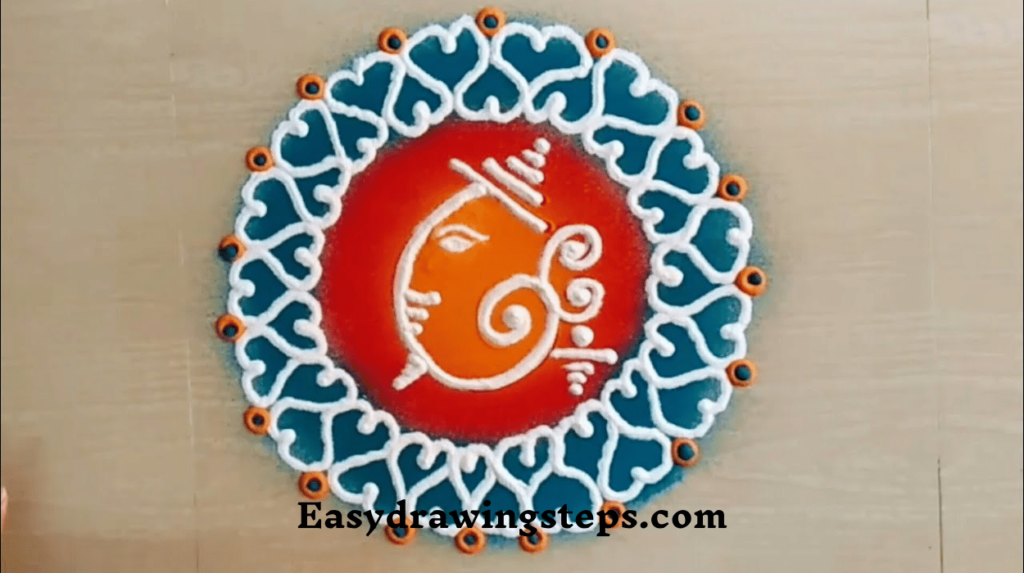
For an easy and beautiful Ganpati rangoli, focus on basic shapes and patterns. Begin with the face of Ganpati, using simple lines and curves. Incorporate elements like large ears, a trunk, and a crown. Don’t worry about perfection—keeping it simple can still be stunning.

Step 5: Fill in the Face
Once the outline is complete, start filling in the face of Lord Ganesha. Use light colors like yellow or orange for the face and trunk. Applying the colors evenly will help maintain a clean and professional look. For beginners, using a stencil can assist in achieving an accurate shape.
Step 6: Add Details and Ornaments
To enhance the design, add details such as the crown and ornaments. Use contrasting colors like red and gold to fill in these elements. For an easy Ganpati rangoli design, focus on bold, simple patterns rather than intricate details.
Also Read : 10 Easy Steps to Draw Jaswand Rangoli
Step 7: Include Floral Patterns
Around the main image, add floral motifs to complement the Ganpati design. Flowers are a traditional addition to rangoli and add vibrancy to the overall pattern. Use bright colors like red and pink for these flowers to create a lively and festive appearance.
Step 8: Create a Border
A decorative border can frame the Ganpati rangoli and make it stand out. You can use simple geometric patterns or dots around the main design. Choose colors that contrast with the center of the rangoli to make the border pop. For a smaller Ganpati rangoli, a subtle border can still be very effective.
Also Read : 10 Easy Steps to Draw Bappa Rangoli Simple
Step 9: Add Finishing Touches
To complete the rangoli, review the entire design and add any final touches. Use a small brush or toothpick to refine edges and ensure the colors are well-blended. If needed, add extra details to enhance the design’s beauty without overwhelming the simplicity.
Step 10: Admire and Enjoy
Once the rangoli is complete, step back and admire your work. This easy Ganpati rangoli will add a beautiful and festive touch to your celebration. Take pictures to share with friends and family, and enjoy the process of creating art that honors Lord Ganesh.
Ganpati Rangoli Easy and Beautiful: Achieving Elegance with Simplicity
- Creating a Ganpati rangoli that is both easy and beautiful involves focusing on simplicity and clarity. Using bold colors and basic shapes can create a stunning design that reflects the joy of the festival. Even with simple elements, your rangoli can be an elegant addition to the celebration.
Ganpati Rangoli Easy Design: Perfect for Beginners
- For those new to rangoli art, an easy Ganpati rangoli design is ideal. By concentrating on basic shapes and colors, beginners can produce a beautiful rangoli without feeling overwhelmed. Using stencils and pre-planned designs can make this process even more manageable.
Gauri Ganpati Rangoli Easy: Incorporating Traditional Elements
- The Gauri Ganpati rangoli design often includes elements that celebrate the goddess Gauri alongside Lord Ganesh. For an easy Gauri Ganpati rangoli, focus on incorporating traditional symbols in a simple manner. This approach allows you to honor both deities while keeping the design straightforward.
Ganpati Rangoli Easy for Beginners: A Step-by-Step Guide
- This guide provides a step-by-step approach to creating a Ganpati rangoli that’s perfect for beginners. By starting with simple outlines and basic colors, beginners can build their skills gradually while producing a rangoli that is both beautiful and manageable.
Small Ganpati Rangoli Easy: Ideal for Limited Spaces
- If you have limited space or prefer a smaller project, a small Ganpati rangoli is a great choice. Focus on creating a compact yet vibrant design that fits your available area. A smaller rangoli can still be striking and meaningful, making it a perfect option for any home.
Creating a Ganpati rangoli can be a joyful and creative way to celebrate Ganesh Chaturthi. By following these 10 easy steps, you can design a rangoli that’s not only beautiful but also accessible for beginners and those looking for a smaller project. Enjoy the process of bringing art and devotion together in a colorful celebration.
Ganpati Rangoli Easy FAQ
What materials are needed to create an Ganpati Rangoli Easy?
To create an easy Ganpati rangoli, you will need colored rangoli powders in various shades (such as red, yellow, green, white, and blue), chalk or white rangoli powder for outlining, a stencil of Lord Ganesha (optional), a small sieve for precise application, and tools like a brush or toothpick for detailed work. These materials will help you achieve a vibrant and beautiful rangoli design.
How can beginners create a beautiful Ganpati rangoli?
Beginners can create a beautiful Ganpati rangoli by starting with a simple design. Focus on basic shapes and bold colors. Using a stencil of Lord Ganesha can help in achieving accurate outlines. Keep the design straightforward, such as outlining the face and adding simple floral patterns around it. Even a basic design can be stunning with careful color application and neat finishing touches.
What are some tips for making a Gauri Ganpati rangoli easy to design?
To make a Gauri Ganpati rangoli easy to design, start with a clear and simple outline of both Lord Ganesh and the goddess Gauri. Use basic shapes and limited colors to avoid complexity. Incorporate traditional symbols in a straightforward manner, and use a stencil if needed. This approach allows you to honor both deities while keeping the design manageable and accessible.
What are some ideas for a small Ganpati rangoli design?
For a small Ganpati rangoli design, focus on creating a compact and vibrant pattern. Choose a central figure of Lord Ganesha and add minimal yet striking elements like small floral patterns or a simple border. Use bright and contrasting colors to make the small rangoli stand out. This type of design is ideal for limited spaces and can still make a significant visual impact.
How can I ensure my Ganpati rangoli is easy and beautiful?
To ensure your Ganpati rangoli is both easy and beautiful, simplify the design by focusing on basic shapes and bold colors. Use stencils for accurate outlines and avoid overly intricate details. Opt for a limited color palette to maintain clarity and impact. Completing the rangoli with neat, clean lines and balanced color application will enhance its beauty while keeping the process straightforward.


3 thoughts on “10 Steps to Draw Ganpati Rangoli Easy”