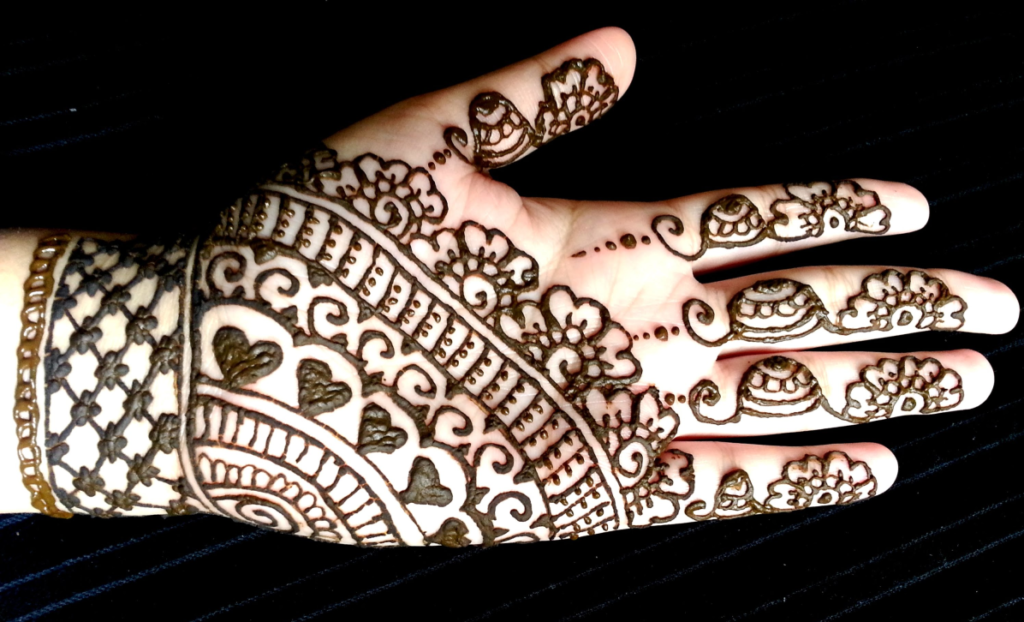
Mehndi Design : the ancient art of adorning the skin with intricate designs, has captivated people for centuries.
While traditionally associated with weddings and festivals, mehndi can also be a delightful activity for children, sparking their creativity and allowing them to explore a beautiful cultural tradition.
In this blog post, we’ll explore simple mehndi designs tailored for kids, offering step-by-step guidance for an enjoyable and enriching experience.
Step 1: Gather Your Supplies for mehndi design
- Before diving into the world of mehndi, it’s essential to gather the necessary supplies. You’ll need henna cones, tissue paper, cotton balls, lemon juice, and a small bowl for mixing.
- Ensure a clean and well-lit workspace for the best results.
Step 2: Prepare the Henna Paste
- Squeeze out the henna paste from the cone into a bowl, and add a few drops of lemon juice to enhance the color.
- Mix the paste thoroughly until you achieve a smooth, creamy consistency.
- Allow the mixture to sit for a couple of hours, allowing the dye to release and deepen in color.
Step 3: Clean and Prep the Skin
- Encourage the child to wash their hands with soap and water, ensuring the skin is clean and free from any oils or lotions.
- Dry the hands thoroughly before starting the mehndi application process.

Step 4: Start with Basic Shapes
- Begin by introducing the child to simple shapes such as circles, dots, and lines.
- These basic shapes serve as the foundation for more intricate designs and allow the child to experiment with different patterns and arrangements.
Also Read : How to do Mehndi Design
Step 5: Add Floral Elements
- Guide the child in creating small flowers using the henna paste. Start with a central dot and draw petals around it, gradually building the flower’s shape.
- Encourage creativity by experimenting with the number and size of petals, as well as the placement of flowers within the design.
Step 6: Connect the Design
- Help the child connect various elements of the design using lines, swirls, or dots. These connecting elements not only enhance the overall aesthetic but also fill in any empty spaces, creating a cohesive and balanced design.
Step 7: Allow the Design to Dry
- Once the design is complete, allow it to dry completely. This typically takes around 1-2 hours, depending on the thickness of the henna paste and environmental conditions.
- Remind the child to avoid smudging or touching the design during this time.
Step 8: Seal and Enhance the Design
- To enhance the color and longevity of the design, apply a mixture of sugar and lemon juice over the dried henna.
- This natural sealant helps intensify the color and ensures the design lasts longer. Allow the sealant to dry before proceeding to the final step.
Step 9: Final Touches and Enjoyment
- Once the henna has dried and set, gently remove any excess paste using tissue paper or a blunt knife.
- Encourage the child to admire their handiwork and express their creativity through their unique mehndi design.
- Celebrate their achievement and allow them to showcase their creation with pride.
Creating simple mehndi designs is not only a fun and creative activity for kids but also a wonderful way to introduce them to the rich cultural heritage of mehndi art. By following these step-by-step guidelines, children can unleash their creativity and create beautiful designs that reflect their unique style and imagination. So, gather your supplies, get creative, and embark on a journey of mehndi magic with your little ones!


1 thought on “9 Easy Steps mehndi design simple for kids”