

Easy Beautiful Peacock Drawing : Drawing a peacock is a rewarding artistic endeavor that showcases the bird’s elegance and vibrant colors.
Whether you’re a beginner or an experienced artist, this guide will take you through 10 easy steps to create a beautiful peacock drawing.
Let’s dive into the creative process!
Step 1: Start with the Basic Outline
Begin your peacock drawing by sketching a simple outline of the body. Draw a small oval for the head and a larger oval below it for the body. Add a long, curved line extending from the body to create the foundation for the tail. This basic outline will help you establish the overall shape of the peacock.
Step 2: Sketch the Neck and Head
Next, draw the peacock’s neck by connecting the head and body with two curved lines. The neck should be slender and graceful. Add a small circle for the eye and a pointed beak on the head. This step will give your peacock a recognizable shape.
Also Read : 10 Steps to Draw Easy Krishna Drawing
Step 3: Draw the Feathers on the Body
Peacocks have a distinctive arrangement of feathers on their body. Begin by sketching small, curved lines along the body to represent the layers of feathers. These feathers should gradually increase in size as they move down the body. This step will add texture and detail to your drawing.
Step 4: Outline the Tail Feathers
The tail is the most iconic feature of a peacock. Start by drawing long, curved lines extending from the back of the body to form the tail feathers. These lines should radiate outward, creating a fan-like shape. The tail will be the centerpiece of your beautiful peacock drawing.

Step 5: Add Details to the Tail Feathers
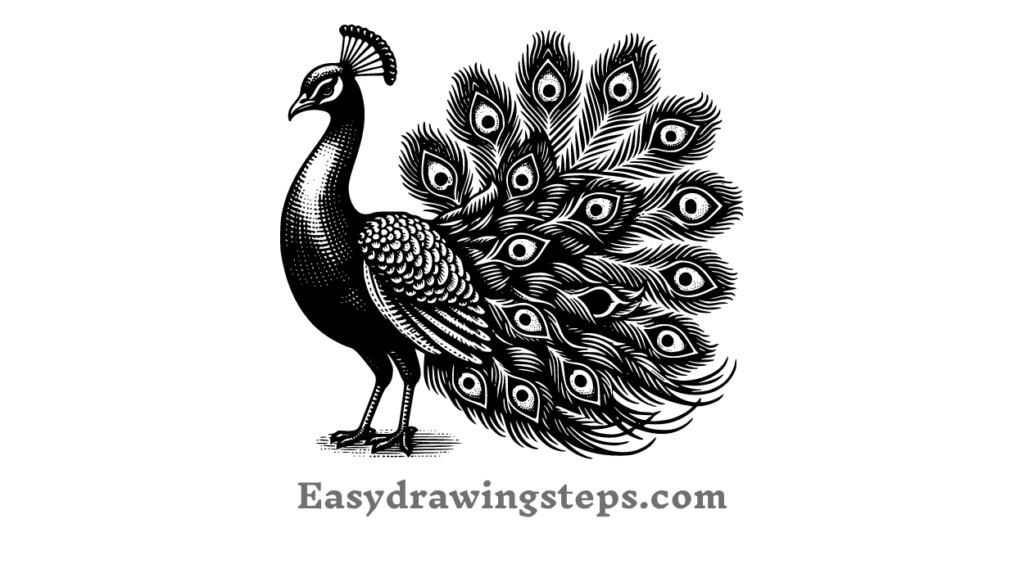
To make the tail feathers more realistic, add the iconic “eye” patterns. These are oval shapes with a small circle in the center, resembling an eye. Draw these patterns along the length of each tail feather, ensuring they are evenly spaced. This step will give your peacock its characteristic appearance.
Step 6: Draw the Legs and Feet
Peacocks have slender legs and feet. Sketch two lines for each leg, slightly bent at the knees, and add small, claw-like feet at the bottom. Position the legs so that they support the body naturally, making your peacock appear poised and balanced.
Also Read : 10 Steps to Draw Owl Drawing
Step 7: Refine the Details
Go over your drawing to refine the details. Smooth out any rough lines, add more feathers if needed, and make sure the proportions are accurate. This is also a good time to enhance the eyes, beak, and overall structure of the peacock. Refining the details will make your drawing look polished and complete.
Step 8: Pencil Shading and Sketching
If you’re creating a pencil sketch, use shading to add depth and dimension to your peacock drawing. Focus on the areas around the neck, body, and tail feathers. Use lighter and darker shades to create a three-dimensional effect, giving your peacock a lifelike appearance.
Also Read : 10 Easy Steps to Draw Bal Gopal Drawing
Step 9: Adding Colour
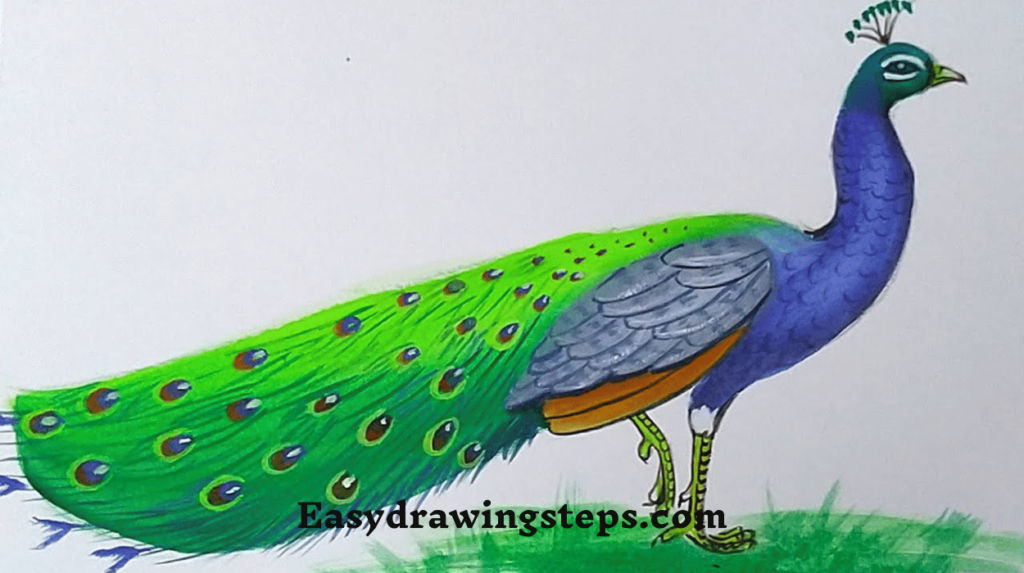
To bring your peacock to life, add vibrant colors to your drawing. Peacocks are known for their striking blue and green feathers, with hints of gold and purple. Use these colors to fill in the body, neck, and tail feathers. Adding color will transform your simple peacock drawing into a stunning work of art.
Step 10: Final Touches
Review your peacock drawing for any final adjustments. Make sure the colors are blended smoothly, the shading is consistent, and the details are well-defined. You can also add a background, such as a garden or forest, to enhance the beauty of your drawing. Once you’re satisfied, your beautiful peacock drawing is complete!
Drawing a peacock is not only a creative activity but also a way to appreciate the beauty of nature. By following these 10 easy steps, you can create a stunning peacock drawing that captures the elegance and vibrancy of this magnificent bird. Whether you choose to keep it as a pencil sketch or add a burst of color, your peacock drawing will be a true masterpiece.
Now that you’ve learned how to draw Easy Beautiful Peacock Drawing, why not try your hand at other drawings? You could explore creating a vinayagar drawing, with its own unique charm and cultural significance. Both the peacock and Vinayagar offer endless possibilities for artistic expression, so pick up your pencils and let your creativity soar! Happy drawing!
Easy Beautiful Peacock Drawing FAQ
What is the first step in Easy Beautiful Peacock Drawing?
The first step in drawing a beautiful peacock is to start with a basic outline. Begin by sketching a small oval for the head and a larger oval for the body, then add a long, curved line extending from the body to form the foundation for the tail. This outline helps you establish the overall shape of the peacock.
How do you create the iconic tail feathers of a peacock in a drawing?
To create the iconic tail feathers of a peacock, draw long, curved lines extending from the back of the body to form the fan-like shape of the tail. Then, add the distinctive “eye” patterns along the length of each tail feather, which are oval shapes with a small circle in the center. These details give the peacock its characteristic appearance.
What colors should be used to make the Easy Beautiful Peacock Drawing vibrant?
To make the peacock drawing vibrant, use shades of blue and green for the feathers, with hints of gold and purple. These colors reflect the natural beauty of a peacock and will bring your drawing to life. You can also blend these colors to create a more dynamic and realistic effect.
How can shading improve a pencil sketch of a peacock?
Shading can greatly improve a pencil sketch of a peacock by adding depth and dimension to the drawing. Focus on shading areas around the neck, body, and tail feathers, using lighter and darker tones to create a three-dimensional effect. This technique makes the peacock appear more lifelike and adds realism to your sketch.
How can you add a final touch to your peacock drawing?
To add a final touch to your peacock drawing, review it for any last adjustments, such as smoothing out lines, enhancing colors, or refining details. You can also add a background, like a garden or forest, to make your peacock drawing stand out even more. These finishing touches will complete your beautiful artwork.
2 thoughts on “10 Steps to Draw Easy Beautiful Peacock Drawing”