

Beautiful Peacock Drawing With Colour : Drawing a beautiful peacock with color can be a rewarding artistic endeavor, bringing out the vibrant beauty of this majestic bird.
Whether you’re aiming to capture a peacock in a natural scenery or focusing on a detailed pencil drawing enhanced with color, following these steps will help you create a stunning piece of art.
Here’s a step-by-step guide to help you draw a colorful peacock, complete with tips for each stage.
Step 1: Sketch the Basic Shapes
Begin by lightly sketching the basic shapes of the peacock. Draw a small circle for the head and a larger oval for the body. Connect these shapes with a smooth, curved line to outline the neck. This foundational sketch serves as the framework for the peacock and will guide the rest of your drawing.
Step 2: Outline the Head and Neck
Add details to the head and neck of the peacock. Sketch the beak as a small triangle and add two small circles for the eyes. Refine the neck with smooth, flowing lines to capture its graceful curve. This step ensures that the peacock’s head and neck are proportionate and well-positioned.
Also Read : 10 Easy Steps to Draw Peacock Drawing Easy And Beautiful
Step 3: Draw the Body and Feathers
Outline the body of the peacock and begin drawing the feathers. Use curved lines to represent the feathers, starting from the neck and extending towards the tail. For a detailed approach, sketch each feather individually, adding texture and overlapping lines to create a natural look.
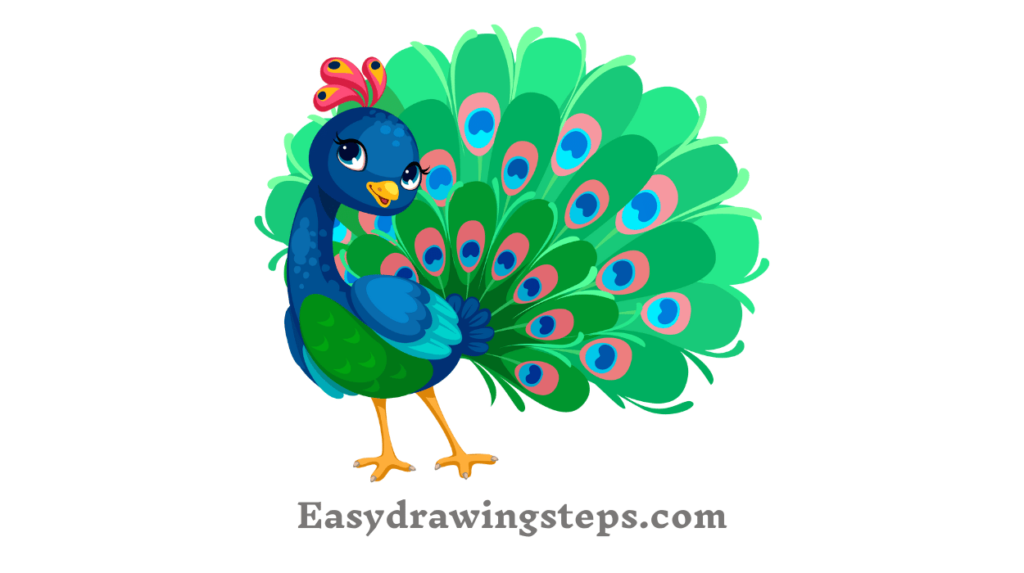
Step 4: Add the Tail Feathers
The tail feathers are one of the peacock’s most striking features. Draw several long, curved lines extending from the back of the body. These lines should fan out to form a semi-circle, with varying lengths to represent the grandeur of the tail. Add detailed patterns, such as eye shapes on each feather, to enhance their appearance.
Step 5: Refine Feather Details
To add depth and realism, refine the details of the feathers. Use short, curved strokes to depict the individual feathers and add texture. Adjust the shading to create a sense of dimension and movement in the feathers, making sure they appear natural and lifelike.
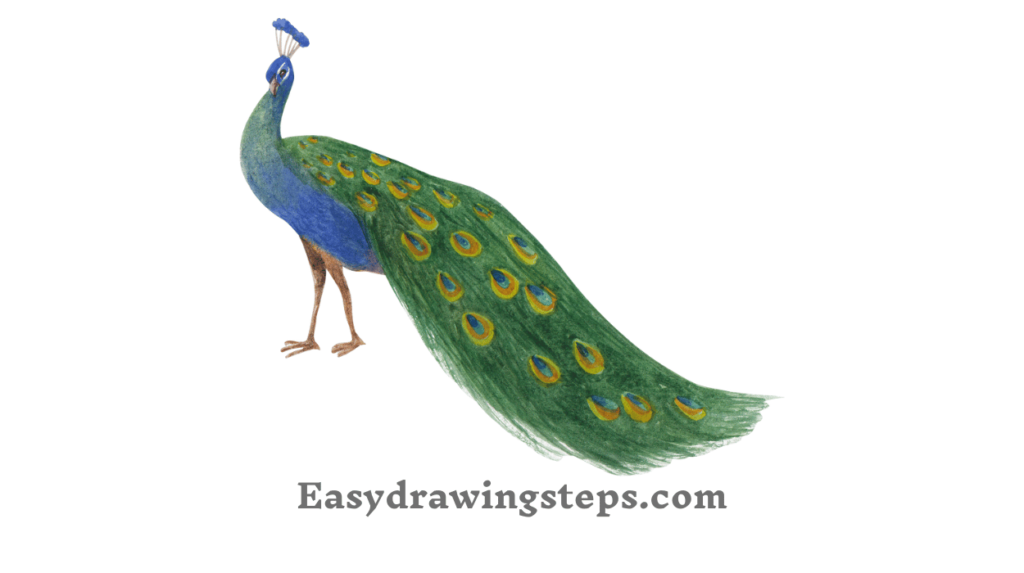
Step 6: Begin Adding Color
Start adding color to your drawing by applying a base layer of color to the peacock’s feathers. Use light strokes to lay down the initial color and build up layers gradually. For a beautiful peacock drawing, vibrant colors like blues, greens, and golds will enhance the feathers’ natural sheen and brilliance.
Also Read : 10 Steps to Draw Easy Beautiful Peacock Drawing
Step 7: Blend and Layer Colors
Blend the colors smoothly to create a harmonious and vibrant look. Use blending tools or a colored pencil blender to merge the colors seamlessly. Layer different shades to add depth and highlight areas where light hits the feathers. This technique will give your peacock a more realistic and striking appearance.
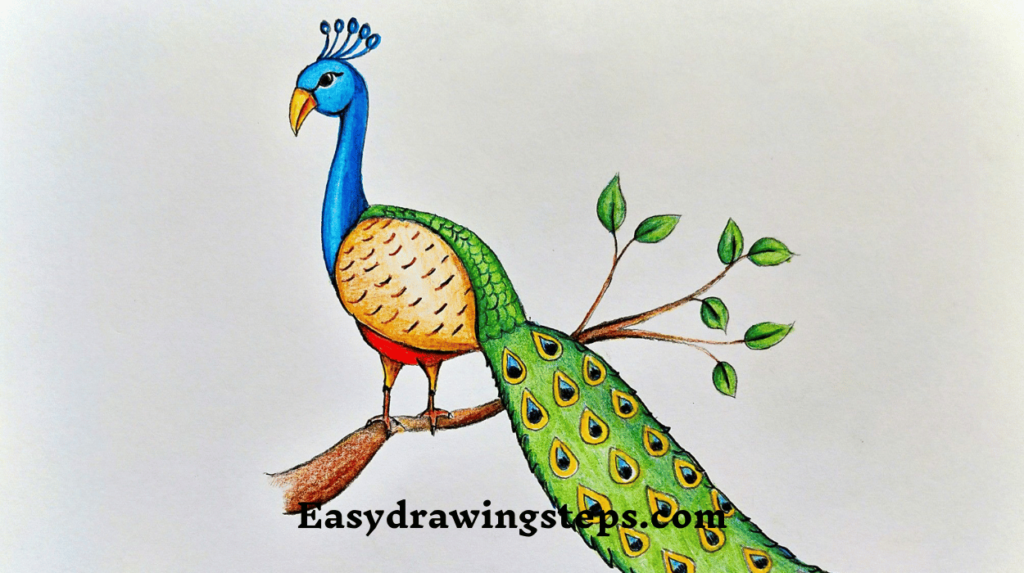
Step 8: Add Scenery and Background
If you’re drawing the peacock within a scenic setting, add background elements such as trees, flowers, or a natural habitat. Use complementary colors for the background to make the peacock stand out. For a nature-inspired look, incorporate greens and earthy tones that enhance the overall beauty of the scene.
Also Read : 10 Easy Steps to Draw Vinayagar Drawing
Step 9: Apply Final Touches
Review your drawing and make any necessary adjustments. Add final details and highlights to the feathers to enhance their texture and depth. Ensure that the colors are well-blended and that the peacock’s features are clearly defined. This step helps to polish your drawing and make it visually appealing.
Step 10: Complete the Drawing
Finish your drawing by adding any additional touches that will enhance its overall beauty. For example, you might add fine lines or subtle color variations to give the peacock a more dynamic and lifelike appearance. This final review ensures that your drawing is complete and ready for display.
Drawing a beautiful peacock with color is a creative and fulfilling process that showcases the bird’s stunning features and vibrant hues. By following these ten easy steps, you can create a visually striking peacock drawing, whether you’re focusing on a detailed pencil drawing enhanced with color or a full-color illustration set in a scenic background. Embrace your artistic skills and enjoy the process of bringing this magnificent bird to life on paper!
Beautiful Peacock Drawing With Colour FAQ
What are the initial steps to start drawing a peacock with color?
Start by sketching the basic shapes of the peacock. Draw a small circle for the head and a larger oval for the body, connecting them with a curved line for the neck. This foundational sketch helps set the proportions and layout. Once the basic shapes are in place, outline the head, neck, body, and tail feathers. This step provides a framework for adding color later.
How can I effectively add color to the peacock’s feathers?
Begin by applying a base layer of color to the feathers using light strokes. Gradually build up the color in layers to achieve the desired vibrancy. Use blending tools or a colored pencil blender to smooth out the color transitions and create a seamless blend. Layering different shades will add depth and enhance the peacock’s natural shine and beauty.
What techniques can be used to blend colors smoothly in a peacock drawing?
To blend colors smoothly, use a blending tool or a colored pencil blender to merge different shades seamlessly. Apply gentle, circular strokes to blend the colors together. You can also use a light touch with your colored pencils to layer colors gradually, which helps create a smooth gradient and realistic texture in the feathers.
How can I incorporate a scenic background into my peacock drawing?
Add background elements such as trees, flowers, or a natural habitat by sketching them lightly behind the peacock. Use complementary colors that enhance the peacock’s appearance without overshadowing it. Incorporate earthy tones and natural hues to create a harmonious and visually appealing setting. Ensure that the background complements the peacock and adds to the overall aesthetic of the drawing.
What are some final touches to enhance the overall appearance of the peacock drawing?
Review your drawing and add final touches such as fine details and highlights to enhance the feathers’ texture and depth. Use a white or light-colored pencil to add highlights where the light naturally hits the feathers. Adjust any areas that need more color or blending to ensure a polished and cohesive look. These final adjustments will make your peacock drawing stand out and appear more lifelike.
1 thought on “10 Easy Steps to Draw Beautiful Peacock Drawing With Colour”