


Beautiful Peacock Drawing : Drawing a beautiful peacock can be a delightful artistic endeavor, whether you’re a beginner or an experienced artist looking to explore creativity.
In this step-by-step guide, we’ll break down the process into simple, manageable steps to help you create a stunning peacock drawing. We’ll cover various techniques from using colors to pencil sketches, ensuring you can choose the style that suits your preference.
Let’s dive into the world of creating art with our feathered friend, the peacock!
Step 1: Gather Your Materials
Before you begin, gather your art supplies. You’ll need:
- Drawing paper or sketchbook
- Pencils (preferably HB, 2B, and 4B for different shades)
- Eraser
- Sharpener
- Colored pencils or markers (optional for color drawing)
Also Read : 10 easy steps to draw Barbie Drawing
Step 2: Start with Basic Shapes
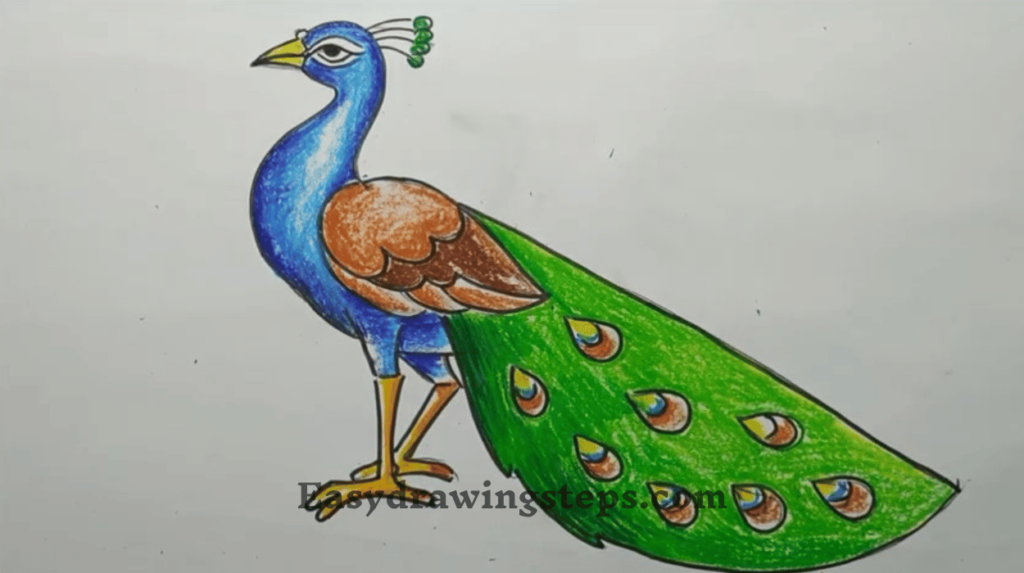
Begin by sketching the basic shapes of the peacock. Draw a large oval for the body and a smaller circle for the head. Add a curved line for the neck and a triangular shape for the beak.
Step 3: Outline the Feathers
Outline the peacock’s extravagant tail feathers. Use long, curved lines extending from the body. Peacock feathers are known for their intricate patterns, so feel free to add details like eyespots along the edges.
Also Read : 10 easy steps to draw Squirrel Drawing
Step 4: Add Details to the Body
Sketch the details of the body, such as the legs and additional feathers around the neck. Peacocks have slender legs with sharp claws, so pay attention to their anatomy.
Step 5: Draw the Eye of the Feathers
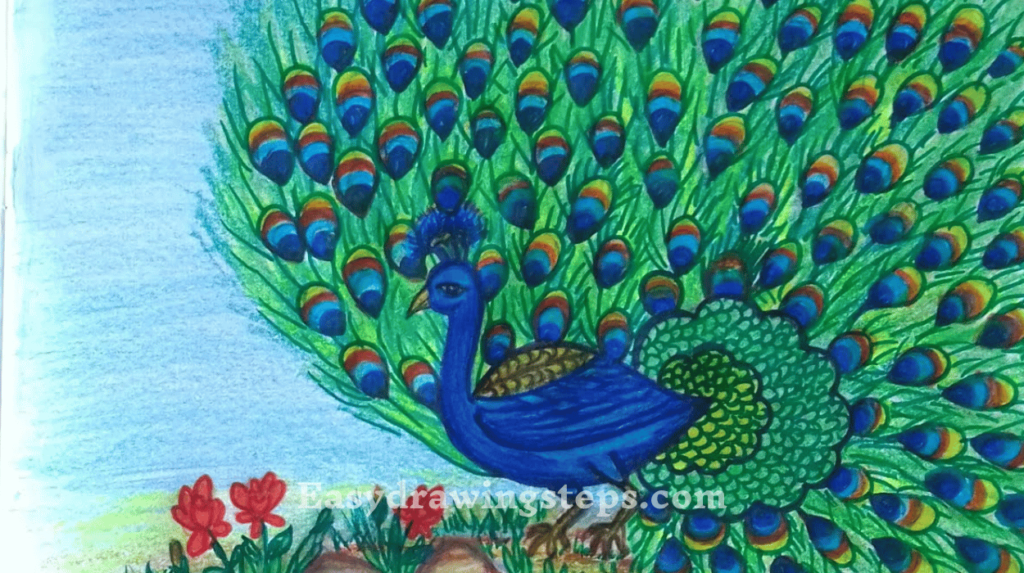
Focus on the eye-shaped feathers at the end of the peacock’s tail. Each “eye” consists of concentric circles with a dot at the center. This detail gives the peacock its distinctive appearance.
Also Read : 10 Easy Steps to Draw Basheer Drawing
Step 6: Add Color (Optional)
If you’re creating a colored drawing, use colored pencils or markers to fill in the peacock’s feathers. Peacocks exhibit a range of vibrant colors, from blues and greens to iridescent purples. Experiment with blending colors to achieve a realistic look.
Step 7: Shade and Texture
For a pencil drawing, use shading techniques to add depth and texture to the feathers. Start with light shading and gradually build up darker tones using different grades of pencils (HB, 2B, 4B). Pay attention to light sources to create realistic shadows.
Also Read : 10 easy steps to draw Vitthal Rangoli Design
Step 8: Refine Details
Refine the details of your drawing by adding small lines and textures to the feathers, body, and face. Pay attention to symmetry and balance, as these elements contribute to the overall beauty of your artwork.
Step 9: Final Touches
Use an eraser to clean up any stray lines or smudges. Adjust the contrast and brightness of your drawing if necessary. Take a step back to assess your artwork and make any final adjustments.
Also Read : 10 easy steps to draw Computer Parts Drawing Easy
Step 10: Sign Your Artwork
Once you’re satisfied with your drawing, sign your artwork in a corner using a fine-tip pen or pencil. This marks your creation as uniquely yours and adds a personal touch to your beautiful peacock drawing.
Drawing a beautiful peacock can be a rewarding experience, whether you opt for a colorful rendition or a detailed pencil sketch. By following these 10 easy steps, you can create a stunning artwork that showcases the grace and elegance of this majestic bird.
Whether you’re exploring your artistic talents or seeking a relaxing hobby, drawing a peacock allows you to connect with nature’s beauty and express your creativity in a meaningful way.
Enjoy the process and let your imagination soar with each stroke of your pencil or brush!
FAQ
What are some essential steps for beginners to draw a beautiful peacock?
Beginners can start by sketching basic shapes like circles and ovals for the peacock’s body and head. They should then outline the feathers with long, curved lines extending from the body. Adding the eye-shaped feathers at the end of the tail involves careful detailing with concentric circles and a dot in the center. Shading techniques, using pencils of different grades, help in adding depth and texture to the drawing. Finally, using vibrant colors with colored pencils or markers enhances the peacock’s appearance, capturing its iridescent plumage effectively.
How can shading techniques improve a peacock drawing?
Shading techniques are crucial for creating depth and realism in a peacock drawing. By using pencils of varying grades, artists can achieve light and shadow effects, which enhance the three-dimensional appearance of the feathers and body. Gradually building up darker tones in areas where shadows fall, such as under feathers or around the body, helps create a sense of depth. Paying attention to light sources and blending techniques further refines the drawing, making it more lifelike and captivating.
What materials are necessary for drawing a peacock?
To draw a peacock, you will need drawing paper or a sketchbook to work on, pencils of different grades (HB, 2B, 4B) for sketching and shading, an eraser for corrections, and a sharpener to keep your pencils sharp. If you want to add color to your drawing, colored pencils or markers can be used to create vibrant feathers. Having a reference photo of a peacock can also be helpful in accurately capturing its unique features and colors.
How can an artist capture the intricate details of a peacock’s feathers?
Capturing the intricate details of a peacock’s feathers requires careful observation and attention to texture and pattern. Starting with a basic outline of the feathers, artists should add details such as eyespots and subtle lines using fine-tip pencils or pens. Shading techniques play a crucial role in creating depth within each feather, with gradual transitions between light and dark areas. Taking time to study reference photos or observe peacocks in real life helps in understanding the unique patterns and arrangements of feathers, ensuring a realistic and detailed representation in the artwork.
What are some tips for adding vibrant colors to a peacock drawing?
Adding vibrant colors to a peacock drawing can be achieved by using colored pencils or markers. Start with lighter colors as a base and gradually build up darker tones to create depth and contrast. Pay attention to the iridescent quality of peacock feathers, blending blues, greens, and purples to mimic their natural sheen. Experimenting with different blending techniques, such as cross-hatching or layering, helps in achieving a realistic and dynamic color palette. Using a reference photo of a peacock can guide color choices and placement, ensuring accuracy in capturing its vibrant plumage.