

Oil Pastel Scenery Drawing : Creating an oil pastel scenery drawing is a fun and rewarding experience. Oil pastels are vibrant and versatile, allowing artists to create beautiful, rich textures and colors in their artwork.
Whether you are a beginner or an experienced artist, following these ten easy steps will help you create a stunning oil pastel scenery drawing.
This guide includes detailed instructions and explanations to ensure a successful and enjoyable drawing process.
Step 1: Gather Your Materials
Before you start, make sure you have all the necessary materials. You will need oil pastels, drawing paper (preferably heavy or textured to hold the pastels well), a pencil for sketching, an eraser, a sharpener, blending stumps or cotton swabs, and a fixative spray to preserve your finished artwork. These materials will help you create a detailed and vibrant oil pastel scenery drawing.
Step 2: Choose Your Scene
Decide on the type of scenery you want to draw. It could be a village scene, a night landscape, a sunset, or any other scenery you find inspiring. Choosing your subject in advance will help you plan your composition and color palette.
Also Read : 10 easy steps to draw Rukia Kuchiki Drawing
Step 3: Sketch the Basic Outline
Using a pencil, lightly sketch the basic outline of your scenery on the drawing paper. Draw simple shapes to represent the main elements, such as hills, trees, buildings, and the horizon line. Keep the sketch light so that it doesn’t interfere with the oil pastels later on.

Step 4: Block in the Background
Begin by applying the base colors for the sky and background elements. Use broad strokes of oil pastel to cover large areas. For a sunset scene, you might use shades of orange, pink, and purple. For a night scene, dark blues and blacks work well. Blend the colors using your fingers, blending stumps, or cotton swabs to create smooth transitions.
Also Read : 10 easy steps to draw Mermaid Drawing
Step 5: Add Midground Elements
Next, focus on the midground elements such as trees, buildings, and hills. Apply the oil pastel colors in layers, starting with the lighter shades and gradually adding darker shades for depth and dimension. Blend the colors smoothly to achieve a realistic look.

Step 6: Draw the Foreground
Now, add details to the foreground elements like grass, flowers, and any other features that are closer to the viewer. Use more vibrant and detailed strokes to make these elements stand out. This will create a sense of depth and perspective in your drawing.
Also Read : 10 easy steps to draw Lion Face Drawing
Step 7: Enhance Details and Textures
Add finer details to your drawing by using the edge of the oil pastels or a sharpener to create thin lines. Pay attention to textures such as the roughness of tree bark, the smoothness of water, or the softness of grass. Adding these textures will make your drawing more realistic and interesting.
Step 8: Blend and Layer Colors
Blend and layer the colors to create smooth transitions and rich tones. Use blending stumps, cotton swabs, or your fingers to mix the colors gently. Layering different shades will give your drawing depth and vibrancy. For example, layering different greens for the grass or blues for the sky can enhance the realism of your scenery.
Also Read : 10 easy steps to draw Village Scenery Drawing
Step 9: Add Highlights and Shadows
To give your drawing a three-dimensional effect, add highlights and shadows. Use lighter colors to highlight areas where the light hits, such as the tops of hills or the edges of buildings. Use darker shades to create shadows, adding depth and contrast to your drawing. This step is crucial for making your scenery look realistic and dynamic.
Step 10: Final Touches and Fixative
Finally, review your drawing and make any necessary adjustments. Add any final touches to enhance details or correct any mistakes. Once you are satisfied with your drawing, use a fixative spray to preserve it. Spray a light, even coat over the drawing to prevent smudging and protect the oil pastel layers.
Other Oil Pastel Scenery Drawing Ideas
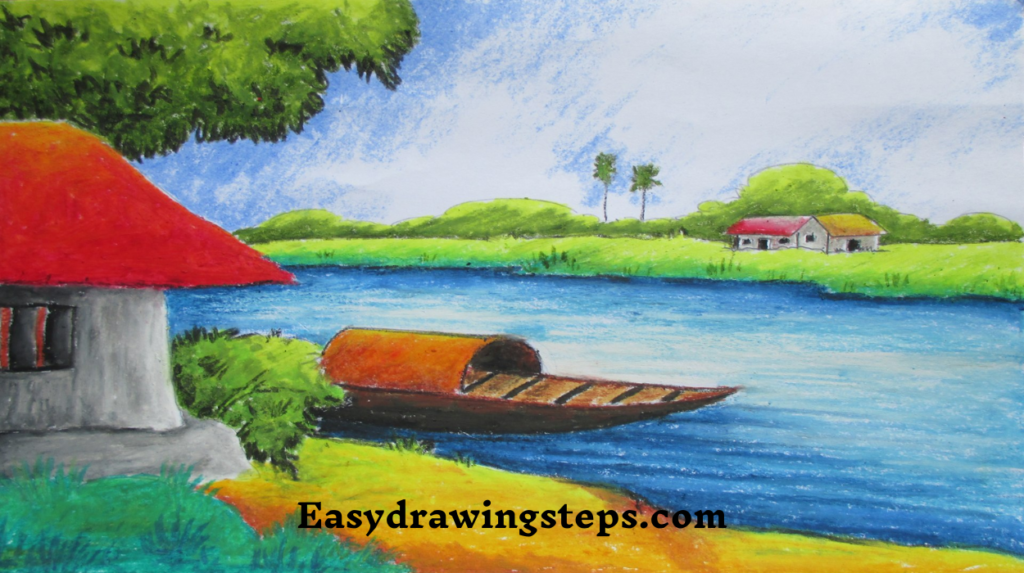
- Village oil pastel scenery drawing: This refers to creating a village scene using oil pastels. Such drawings often include elements like houses, trees, fields, and paths, depicted with vibrant colors and rich textures characteristic of oil pastels.
- Night oil pastel scenery drawing: This involves drawing a nighttime scene with oil pastels. The focus is on using dark shades like blues and blacks to capture the essence of a night landscape, possibly featuring a moonlit sky, stars, and silhouettes.
- Easy sunset simple oil pastel scenery drawing: This refers to a straightforward and easy-to-follow approach to drawing a sunset scene with oil pastels. The emphasis is on using warm colors like oranges, pinks, and purples to depict the beauty of a sunset in a simple manner.
- Easy oil pastel scenery drawing: This highlights the simplicity and accessibility of creating a scenery drawing with oil pastels. The steps are designed to be easy to follow, making the process enjoyable for beginners and kids alike.
Creating an oil pastel scenery drawing is a fun and rewarding activity, especially with these simplified steps. This guide makes the process easy for everyone, including kids and beginners.
By starting with basic shapes and gradually adding details, even novices can create a detailed and vibrant scenery. Using oil pastels allows for rich, vivid colors and smooth blending, making your artwork stand out.
Whether you choose a village scene, a night landscape, or a sunset, following these ten steps will help you create a beautiful and realistic oil pastel scenery drawing. Enjoy the process and happy drawing!
FAQ
What materials are essential for creating an oil pastel scenery drawing?
To create an oil pastel scenery drawing, you will need the following materials: oil pastels, drawing paper (preferably heavy or textured to hold the pastels well), a pencil for sketching, an eraser, a sharpener, blending stumps or cotton swabs, and a fixative spray to preserve your finished artwork. These materials will help you achieve vibrant colors, rich textures, and a well-preserved final piece.
How can beginners start with oil pastel scenery drawings?
Beginners can start with oil pastel scenery drawings by following a step-by-step approach. Begin by lightly sketching the basic outline of your scenery with a pencil. Start with broad strokes to block in the background colors, and gradually add midground and foreground elements. Use simple shapes and basic color blending techniques to create a cohesive scene. Practice blending colors and adding details to enhance the drawing.
What techniques can be used to blend oil pastels effectively?
To blend oil pastels effectively, use your fingers, blending stumps, or cotton swabs. Apply gentle pressure and use circular motions to mix the colors smoothly. Layer different shades to create depth and transitions. You can also use a bit of baby oil on a cotton swab for a smoother blend. Experiment with different tools and techniques to achieve the desired effect in your drawing.
How can you add depth and dimension to an oil pastel scenery drawing?
To add depth and dimension to an oil pastel scenery drawing, focus on shading and highlighting. Identify the light source in your drawing and add shadows to areas where the light doesn’t hit, such as the undersides of trees, the sides of buildings, and the lower parts of hills. Use lighter colors to highlight areas where the light hits, like the tops of hills and edges of buildings. This contrast between light and dark will create a three-dimensional effect.
What are some common subjects for oil pastel scenery drawings?
Common subjects for oil pastel scenery drawings include village scenes, night landscapes, sunsets, and natural landscapes like forests, mountains, and rivers. Each subject offers unique opportunities to explore different colors, textures, and compositions. Village scenes often include houses, trees, and paths, while night landscapes focus on dark skies and moonlit elements. Sunsets feature warm, vibrant colors, and natural landscapes highlight the beauty of nature.
4 thoughts on “10 easy steps to draw Oil Pastel Scenery Drawing”