
Peacock Drawing For Kids : Drawing a peacock can be a fun and educational activity for kids. With its beautiful feathers and vibrant colors, the peacock is a popular subject for young artists.
In this guide, we’ll walk through 10 easy steps to draw a peacock that’s perfect for kids.
Whether you’re using pencils, crayons, or markers, these steps will help create a beautiful peacock drawing that children will be proud of.
Step 1: Draw the Peacock’s Head and Body
Begin by drawing a small circle for the peacock’s head and a larger oval shape just below it for the body. This simple outline forms the foundation of the peacock and is easy for kids to start with. Make sure the head is slightly above and connected to the body to show the neck.
Step 2: Add the Beak and Eyes
Next, draw a small triangle for the beak on the front of the head. Just above the beak, add two small circles for the eyes. You can fill in the eyes with a black dot to show the pupils. These features will give the peacock a friendly and approachable appearance, perfect for a drawing aimed at kids.
Also Read : 10 easy steps to draw Simple Scenery Drawing
Step 3: Draw the Neck
Connect the head to the body by drawing two curved lines to form the neck. The neck should be slim and slightly curved to give the peacock an elegant posture. This step is simple and easy for kids to follow.
Step 4: Sketch the Body Feathers
Now, draw short, curved lines all over the body to represent the feathers. These lines should be light and gentle, giving the body a fluffy appearance. This adds texture to the peacock drawing without being too complicated for kids to replicate.
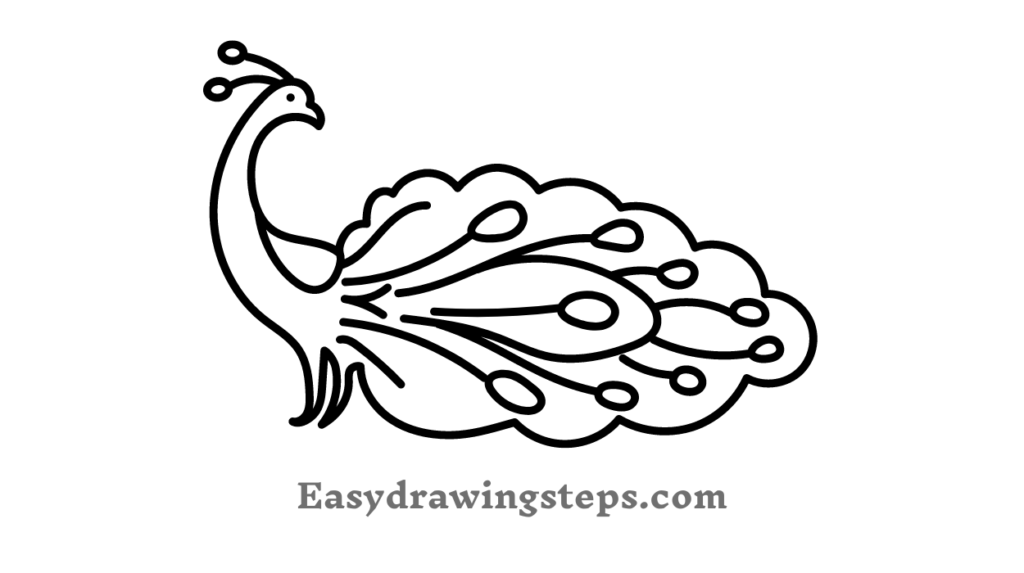
Step 5: Outline the Tail Feathers
The tail is the most exciting part of a peacock drawing! Draw several long, curved lines extending from the back of the body to form the tail feathers. These lines should fan out from the body, creating a semi-circle shape. Encourage kids to make the lines as long and wide as they like to show the grandness of the peacock’s tail.
Step 6: Add the “Eye” Patterns on the Tail Feathers
To make the tail feathers look authentic, draw small oval shapes with a dot in the middle along each feather. These are the famous “eye” patterns that peacocks are known for. Kids can have fun experimenting with the size and placement of these patterns.
Also Read : 10 easy steps to draw Pencil Scenery Drawing
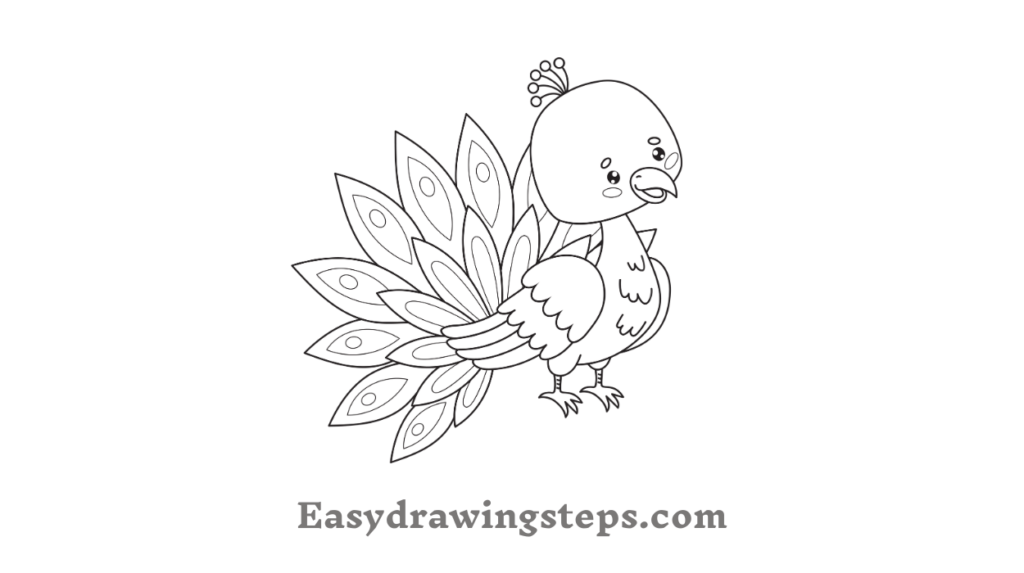
Step 7: Draw the Legs and Feet
Peacocks have long, slender legs. Draw two straight lines for each leg, slightly bent to show that the peacock is standing. Add small feet at the bottom with three toes on each foot. This step is straightforward and adds balance to the drawing.
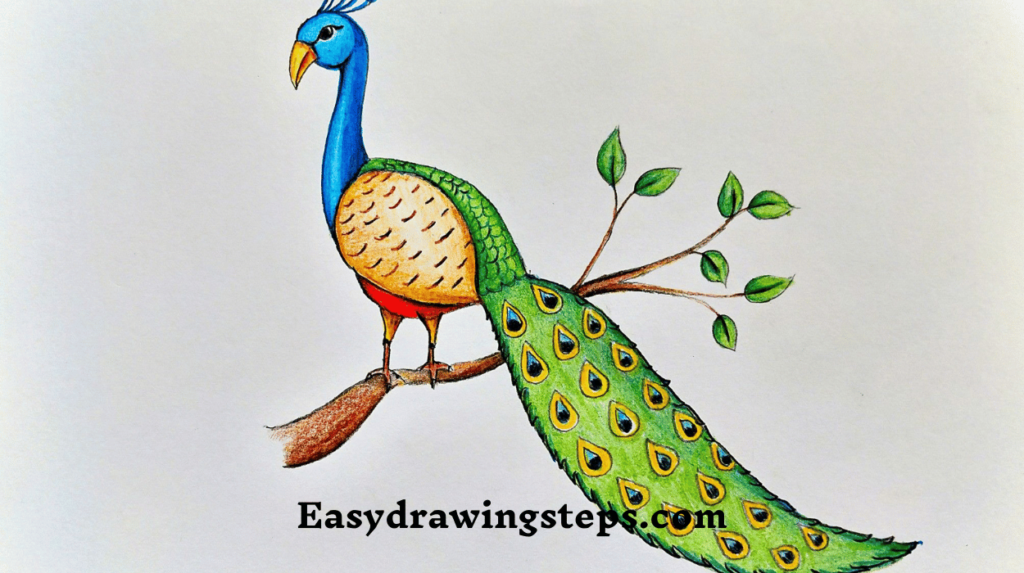
Step 8: Color the Peacock
Now comes the fun part—coloring! Peacocks are known for their vibrant colors, so use shades of blue, green, and gold to color the feathers. The body can be blue, while the tail feathers can be a mix of green and gold with the “eye” patterns highlighted. This step allows kids to get creative and make their peacock drawing truly beautiful.
Also Read : 10 easy steps to draw Scenery Drawing For Kid
Step 9: Add Details and Decorations
To make the drawing more interesting, kids can add additional decorations around the peacock. This could be flowers, trees, or even a sun in the background. These extra details make the drawing more lively and give kids a chance to personalize their artwork.
Step 10: Final Touches
Finally, go over the entire drawing to add any last touches. Kids can outline the peacock in a darker color to make it stand out or add more color to the background. This final step ensures the drawing is complete and ready to be displayed.
Drawing a peacock can be a delightful experience for kids, combining creativity with learning. By following these 10 easy steps, children can create a simple yet beautiful peacock drawing that they’ll be proud of. Whether it’s a pencil peacock drawing or a colorful masterpiece, this guide makes the process accessible and fun for kids of all ages.
Encourage kids to try different approaches, such as using different colors or adding more details, to make their peacock drawings unique. With practice, they’ll be able to create stunning peacock drawings with ease and confidence. Happy drawing!
Peacock Drawing For Kids FAQ
What is the first step in drawing a peacock for kids?
The first step in drawing a peacock for kids is to start with the basic shapes. Draw a small circle for the peacock’s head and a larger oval shape below it for the body. This simple outline helps establish the peacock’s form and is easy for kids to follow.
How can kids make the peacock’s tail feathers look authentic?
To make the peacock’s tail feathers look authentic, kids can draw long, curved lines extending from the back of the body to form the tail. Then, add small oval shapes with dots inside along each feather to create the iconic “eye” patterns. This step adds character to the peacock and makes the drawing more realistic.
What colors should kids use to make their peacock drawing vibrant?
Kids should use shades of blue, green, and gold to make their peacock drawing vibrant. The body can be colored in blue, while the tail feathers can feature a mix of green and gold with highlighted “eye” patterns. These colors bring out the beauty of the peacock and make the drawing stand out.
How can kids personalize their peacock drawing?
Kids can personalize their peacock drawing by adding extra details and decorations around the peacock. They can draw flowers, trees, or a sun in the background to make the scene more lively. Adding these elements allows kids to get creative and make the drawing unique.
What is the final step in completing a peacock drawing for kids?
The final step in completing a peacock drawing for kids is to go over the entire drawing and add any last touches. Kids can outline the peacock in a darker color to make it stand out more or add extra color to the background. This step ensures that the drawing looks polished and ready for display.