
Village Oil Pastel Scenery Drawing : Drawing a village scenery with oil pastels can be an enriching and creative experience. The vibrant colors of oil pastels make it easy to capture the rustic charm and natural beauty of a village setting.
Whether you’re an experienced artist or a beginner, following these 10 easy steps will help you create a beautiful village oil pastel scenery drawing that stands out with vivid colors and a serene atmosphere.
Step 1: Gather Your Materials
Before starting your drawing, make sure you have all the necessary materials. You’ll need a set of oil pastels, a piece of drawing paper suitable for pastels, a blending tool or cotton swabs, and masking tape to secure the paper.
| Materials | Purpose |
|---|---|
| Oil Pastels | For vibrant and smooth color application |
| Drawing Paper | Thick paper suitable for oil pastels |
| Blending Tools | Cotton swabs or blending stumps for soft transitions |
| Masking Tape | To secure the paper and create clean edges |
Step 2: Sketch the Basic Outline
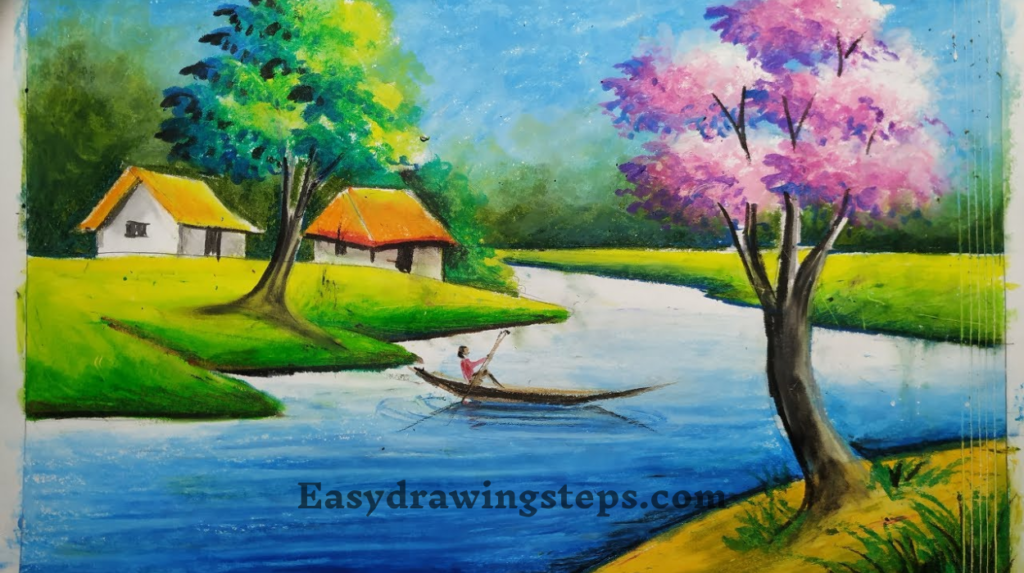
Start by lightly sketching the basic outline of your village scene with a pencil. Focus on the main elements such as houses, trees, pathways, and any water bodies like a river or pond. Keep the composition simple, especially if you’re a beginner, to make the drawing process easier and more enjoyable.
Also Read : 10 steps to draw Easy Pencil Cute Girl Drawing
Step 3: Begin with the Sky
Start coloring the sky using light blue and white pastels. Blend the colors smoothly to create a gradient effect, representing the natural gradation of the sky from darker at the top to lighter near the horizon. If you’re drawing a sunset, use shades of orange, pink, and yellow to create a warm, glowing sky.
Step 4: Add the Background Elements
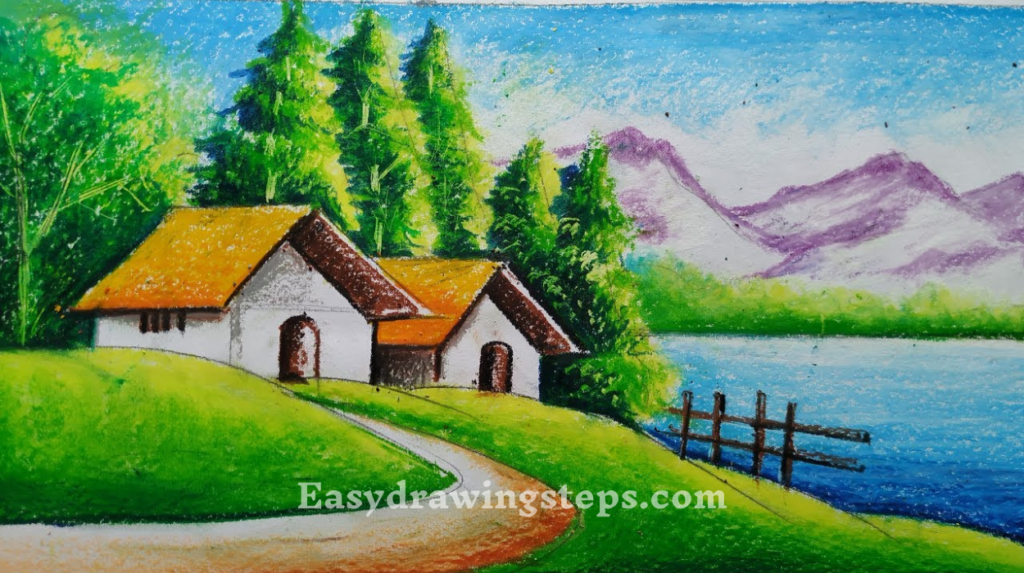
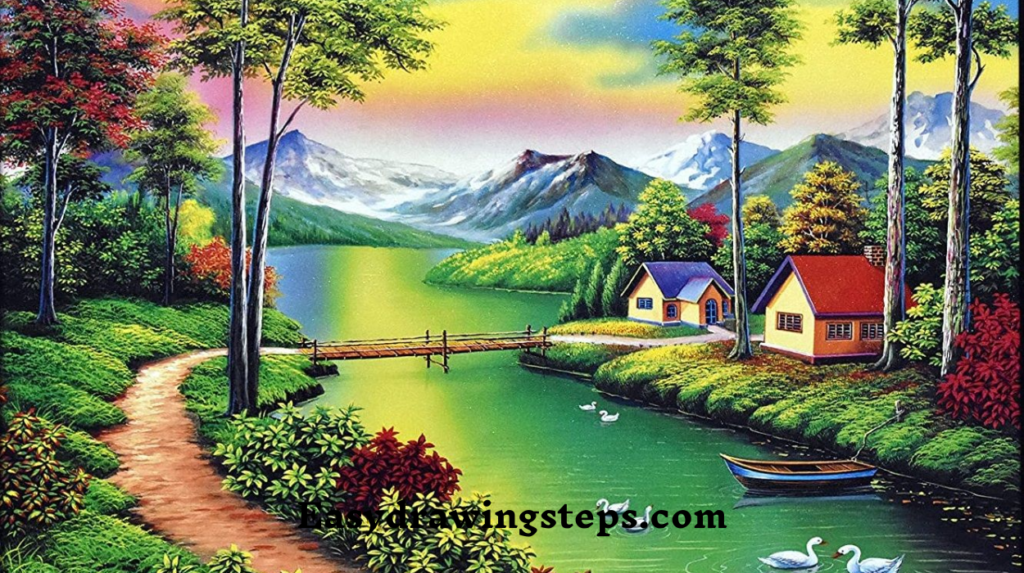
Next, focus on the background elements such as distant hills, fields, or mountains. Use lighter colors and softer blending to make these elements recede into the distance. This step helps establish depth in your drawing, making the village scenery look more realistic.
Also Read : 10 steps to draw Cute Girl Drawing Easy
Step 5: Work on the Village Houses
Now, turn your attention to the village houses. Use earthy tones like brown, beige, and orange to color the walls and roofs. Add details like windows and doors with darker shades. The roofs can be made of different materials, such as thatch or tiles, so feel free to experiment with textures.
Step 6: Add Trees and Foliage
Incorporate trees and foliage into your scene. Use various shades of green, from dark to light, to give the trees a realistic appearance. For the leaves, use a stippling technique by dabbing the pastel to create a textured look. The trees can have trunks in brown or gray, depending on the type of tree you’re depicting.
| Elements | Color Suggestions |
|---|---|
| Village Houses | Earthy tones like brown, beige, and orange |
| Trees and Foliage | Dark to light greens for leaves, brown or gray for trunks |
| Background Hills | Light greens or blues to create depth and distance |
Step 7: Focus on the Pathways and Roads
Create pathways or roads that wind through the village. Use shades of brown, gray, or even reddish tones, depending on the type of path. Add subtle shadows to give the pathways depth and make them look worn by daily use. If there’s a river or pond, use blue and white pastels to depict water, blending the colors to create a reflective surface.
Also Read : 10 easy steps to draw Simple Cute Girl Drawing
Step 8: Enhance the Scenery with Details
Add smaller details to bring the village scene to life. This could include animals, villagers, fences, or small gardens. These details add character to the drawing and make it more engaging. Use contrasting colors to ensure these details stand out against the rest of the scenery.
Also Read : 10 easy steps to draw Cute Girl Drawing Easy For Kids
Step 9: Blend and Refine the Drawing
Use a blending tool or your fingers to gently blend the oil pastels, softening any harsh lines and creating smooth transitions between colors. Be careful not to over-blend, as it can make the drawing look muddy. Blending helps unify the colors and gives the drawing a cohesive look.
Step 10: Final Touches and Highlights
Finally, add any necessary highlights or shadows to enhance the three-dimensional effect. Use white or light colors to highlight areas where the light naturally falls, and dark colors for shadows. These final touches will give your village scenery drawing a polished and finished appearance.
Village Oil Pastel Scenery Drawing FAQ
What makes oil pastels suitable for drawing village scenery?
Oil pastels are ideal for drawing village scenery because they offer vibrant colors and a smooth blending ability, which helps capture the natural beauty and charm of rural landscapes. The rich texture of oil pastels allows for easy layering and adding depth, making the scenery come to life.
How do you create depth in a village oil pastel scenery drawing?
Depth in a village oil pastel scenery drawing is created by using lighter colors and softer blending for background elements like hills and mountains. This makes them appear farther away, while darker, more detailed elements in the foreground, like trees and houses, give the scene a three-dimensional effect.
Why is it important to blend oil pastels when drawing scenery?
Blending oil pastels is important because it helps create smooth transitions between colors, making the drawing look more realistic and cohesive. Proper blending softens harsh lines, unifies different elements, and enhances the overall harmony of the scenery.
What colors should be used for the sky in a village scenery drawing?
The colors for the sky in a village scenery drawing can vary depending on the time of day. For a daytime scene, light blue and white are commonly used, blended to create a gradient. For a sunset, shades of orange, pink, and yellow can be used to depict the warm, glowing colors of the setting sun.
How can small details enhance a village oil pastel scenery drawing?
Small details, such as animals, villagers, fences, or gardens, can greatly enhance a village oil pastel scenery drawing by adding character and interest. These details make the scene more engaging and realistic, helping to tell a story and bring the village to life.
5 thoughts on “10 easy steps to draw Village Oil Pastel Scenery Drawing”